In PowerPoint, and in other Microsoft 365 programs you typically need to sign in to a Microsoft Account so that you can access saved settings, customizations, and even some files off the cloud. You typically do this by managing your Account, right inside PowerPoint or another Microsoft 365 program such as Word and Excel. The Account tab in Backstage view allows you to sign in to your Microsoft Account, and automatically connect to your OneDrive account, and do so much more.
Follow these steps to access Account options in PowerPoint 365 for Windows:
- If you have launched PowerPoint, choose Account, as shown highlighted in green within Figure 1, below. Alternatively, if you already have a presentation open, choose the File menu to bring up the Backstage view, and select Account.
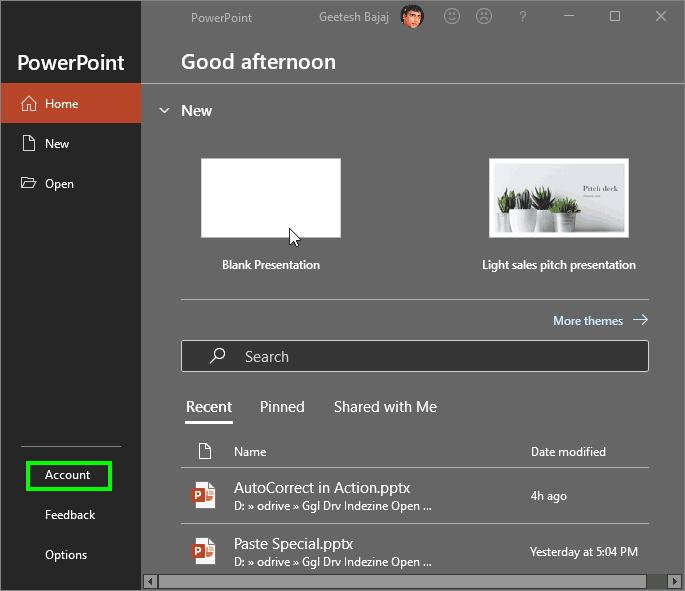
Figure 1: Access Accounts in PowerPoint - Doing so brings up the Account tab of Backstage View, as shown in Figure 2, below.
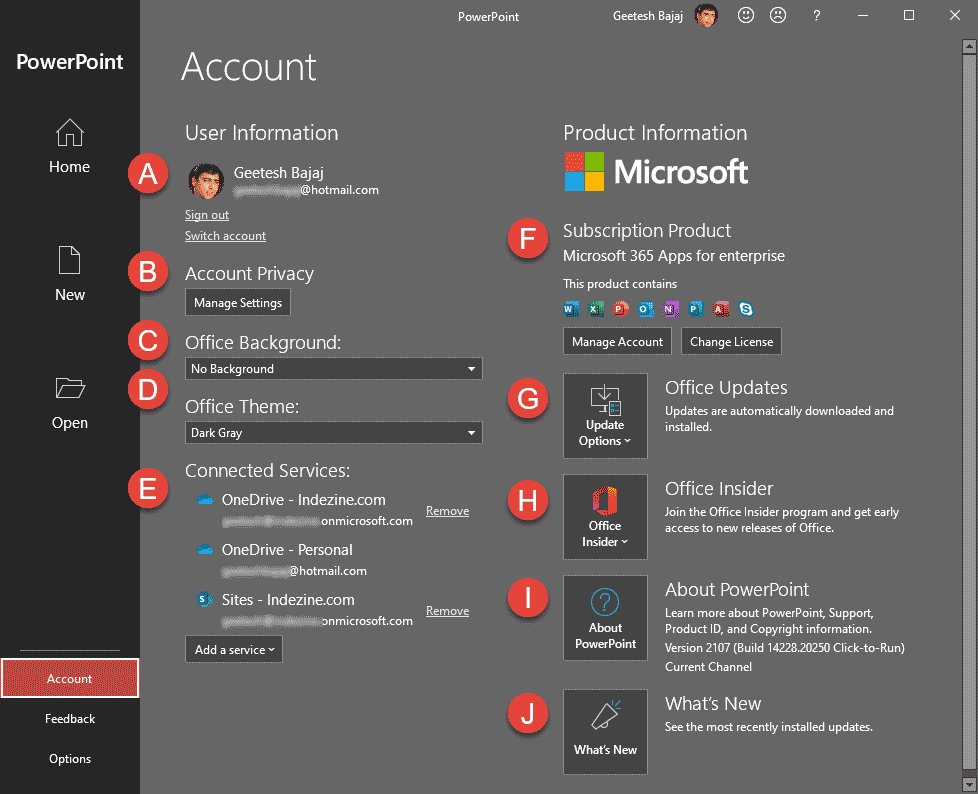
Figure 2: Account tab within PowerPoint Backstage view - Within the Account tab, you'll find several options, as marked in Figure 2, above:
A. User Information
- Here, you find options to sign out, or update your account info, or even switch to a separate account altogether, as explained below:
Sign Out
- To learn more, read our Sign Out and Switch Accounts in PowerPoint tutorial.
Switch Account
- To learn more, read our Sign Out and Switch Accounts in PowerPoint tutorial.
B. Account Privacy
- Clicking the Manage Settings button brings up the Privacy Settings dialog box, shown in Figure 3, below. There are two top options about Required diagnostic data and Optional diagnostic data. Both options provide Learn more links that open pages with more information on Microsoft’s website. Additionally, the Optional diagnostic data area includes the Send additional diagnostic and usage data to Microsoft checkbox, highlighted in red within Figure 3. This checkbox is turned off by default.
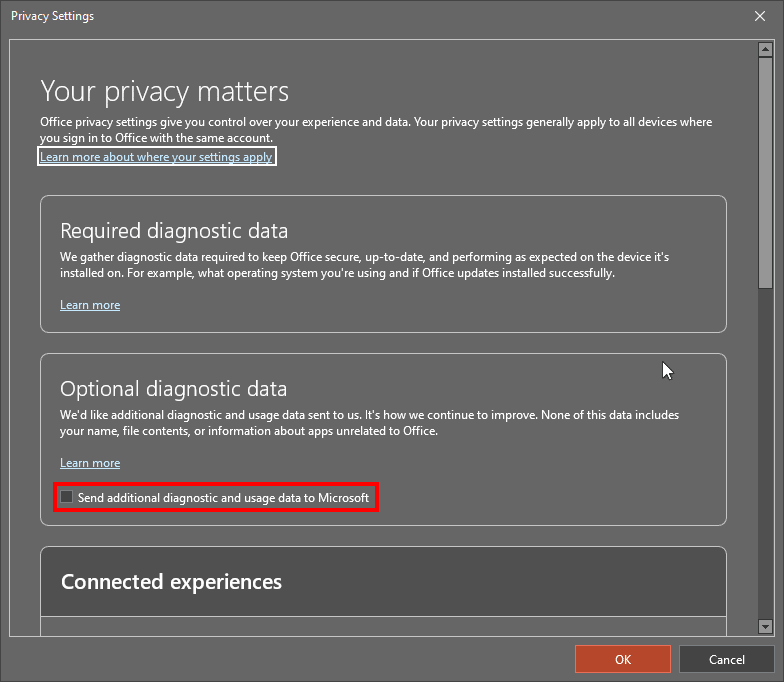
Figure 3: Privacy Settings - You can scroll down further to see options for Connected experiences. These options are explained in our Connected Services in PowerPoint 365 for Windows page.
C. Office Background
- PowerPoint includes the concept of Office Background, which essentially changes or adds a small patterned strip on the top-right area of the program interface, as shown in Figure 4, below.

Figure 4: The Office Background can be patterned - Learn more in our Office Background in PowerPoint 365 for Windows tutorial.
D. Office Theme
- Office Theme enables you to change the PowerPoint 365 interface color.
E. Connected Services
- Connected services help you access your settings and recent files or templates across all your devices, including laptops, tablets, and even smartphones. Additionally, some services allow you to access media and document files too.
Add a Service
- Learn more in our Add Services in PowerPoint tutorial.
F. Product Information
- This area displays product info that can be useful to ascertain what type of license you are using. You can also determine whether the application is activated or not.
- Clicking the Manage Account button launches your account page in a new browser window. Clicking the Change License button brings up a window, as shown in Figure 5, below, that lets you switch to another Office license.
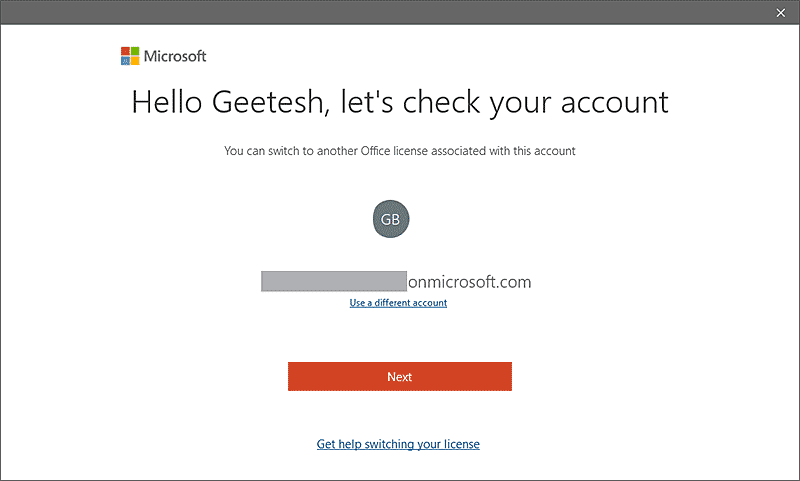
Figure 5: Change License in PowerPoint 365 G. Office Updates
- Clicking on Office Updates brings up a flyout menu, as shown in Figure 6, below.
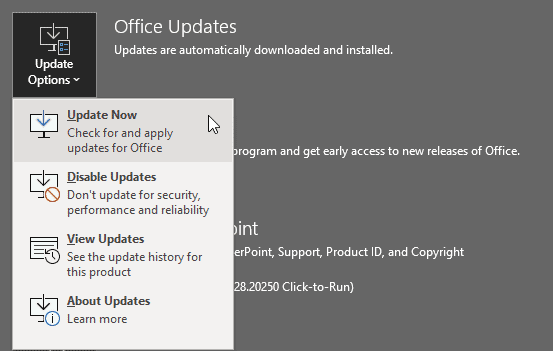
Figure 6: Office Updates flyout menu in PowerPoint 365 - The options in this menu are explained below:
Update Now
- Checks if updates are available and lets you download and install updates. If you already have all updates installed, then PowerPoint will inform you.
Disable Updates
- Disables automatic updates. To re-enable updates, you can now click on the new Enable Updates option in the same menu, as shown highlighted in red within Figure 7, below.
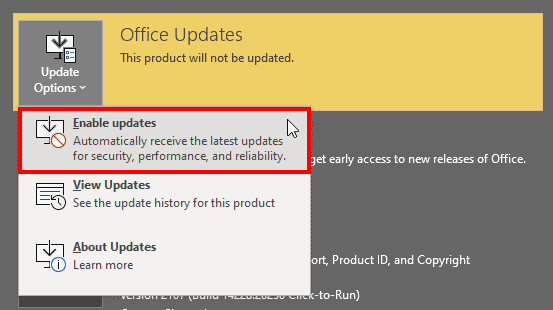
Figure 7: Enable updates in PowerPoint 365 View Updates
- Opens the What’s new in Microsoft 365 page in your default web browser.
About Updates
- Brings up an Automatic Updates message box with some info.
H. Office Insider
- Office Insider is a Microsoft 365 release ring that lets subscribers receive new updates sooner than other subscribers. In some cases, you may not see this button at all, but if you do see this button, clicking will bring up the flyout menu shown in Figure 8, below.
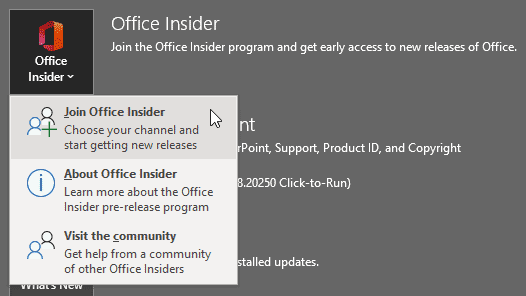
Figure 8: Office Insider flyout menu - Options within this menu are explained below:
Join Office Insider
- Clicking this option brings up the Join Office Insider window, shown in Figure 9, below.
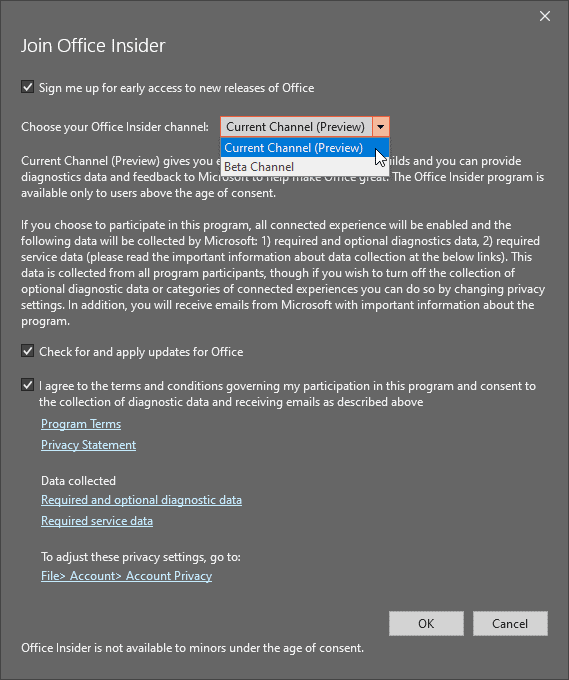
Figure 9: Join Office Insider Change Level
- Once you make choices and click the OK button, you will see the Congratulations, you've been successfully opted into the Office Insider Program window, as shown in Figure 10, below. You can check the Take me to the Office Insider website to subscribe to a monthly newsletter option before clicking the OK button.
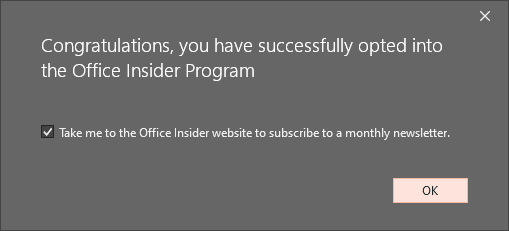
Figure 10: Opted into the Office Insider Program
Why Don’t I See an Office Insider Button
- In many cases, you can only find Office Insider options if you or your sysadmin expressly chose to install an Office Insider release ring of Microsoft Office, as part of your Microsoft 365 subscription benefits. So if you don’t see Office Insider options, you need to get in touch with your sysadmin. Even then, it may not always be possible to get signed into Office Insider because most companies prohibit Office Insider access. New features may behave unpredictably or conflict with your other applications, and therefore many companies won’t allow Office Insider access. However, it is much easier to add Office Insider to personal and home Microsoft 365 subscriptions for the same reason.
About Office Insider
- Opens the Office Insider page on Microsoft’s site in your default browser.
Visit the Community
- Opens the Microsoft 365 and Office forum page in your default browser.
I. About PowerPoint
- Clicking this option summons the About Microsoft PowerPoint window with detailed technical information, as shown in Figure 11, below.
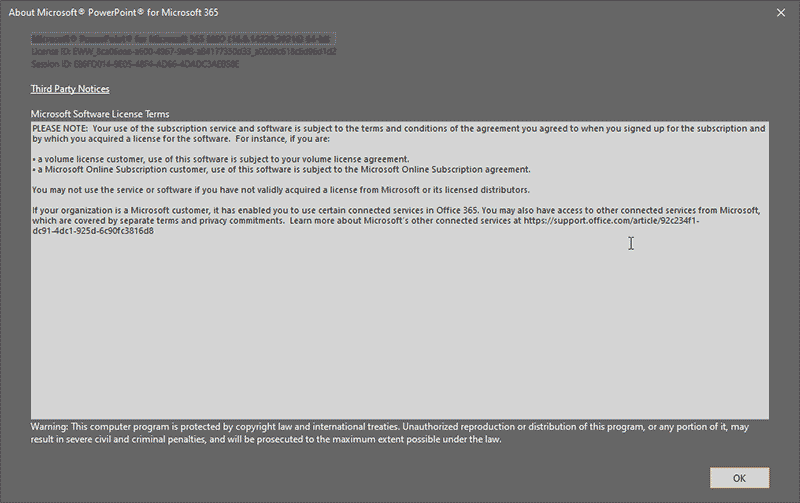
Figure 11: About Microsoft PowerPoint window - Click the OK button to close this window.
J. What's New
- Clicking this button provides information on new features installed in the last update, as shown in Figure 12, below.
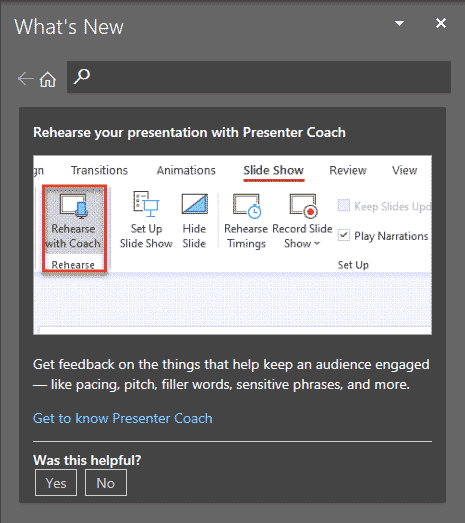
Figure 12: What's new in PowerPoint 365? - To go back to PowerPoint's Normal view again, click the Back Arrow button on the top left corner within the Backstage view, as shown highlighted in green within Figure 13, below. If the Back Arrow button is not available, click the Home tab
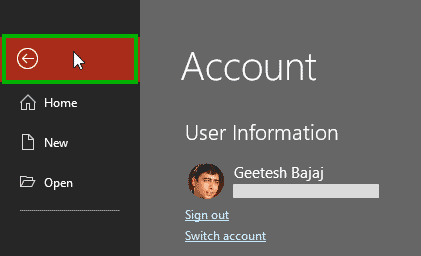
Figure 13: Go back to Normal view


