Microsoft changes PowerPoint's capabilities through updates, and this feature may no longer be available within PowerPoint. This page is being maintained for historical reasons.
Although it is easy to insert pictures from the Clip Art task pane, it is still a good idea to save the pictures you use locally so that you can use them anytime you want. This is important because the same picture may not show up again in the future since nowadays the pictures you retrieve via a search are those that are on web sites, and they use Bing's search technology. Such searches are dynamic, and results can vary, even after a few hours! So it is important that you save a picture you want to use often locally, in case you want to use it in the future. PowerPoint 2010 for Windows allows you to save pictures locally by adding them to a small program called the Clip Organizer.
Follow these steps to learn more:
- Launch PowerPoint and access the Clip Art Task Pane, and make sure that the Include Bing Content check-box is selected, as shown highlighted in blue within Figure 1, below. Then enter the search keyword(s). We searched for "tomato".
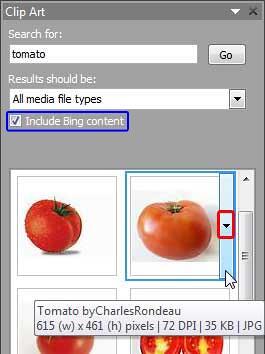
Figure 1: Search within the Clip Art Task Pane - Once you retrieve your search results, choose the picture you want to use, and hover your cursor over to bring up a Down Arrow button (shown highlighted in red within Figure 1, above). Now, just click this Down Arrow button.
- Alternatively, just right-click on the picture.
- Either way, you will bring up the contextual menu that you see in Figure 2. Here select the Make Available Offline option, as shown highlighted in red within Figure 2.
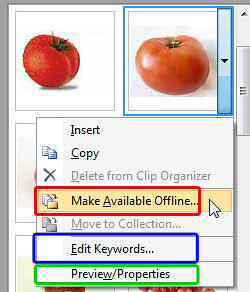
Figure 2: Make Available Offline option - Do you see the Edit Keywords option, highlighted in blue within Figure 2? This opens up the Keywords dialog box as explained in our Edit Keywords in Clip Organizer tutorial. Note the Preview/Properties option, highlighted in green within Figure 2, above. This opens up the Preview/Properties dialog box as explained in our Properties in Clip Organizer tutorial.
- This opens the Copy to Collection dialog box, as shown in Figure 3. Here
you can choose the folder where you want to add the selected clip.
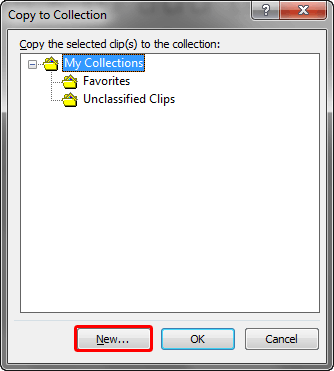
Figure 3: Copy to Collection dialog box - You can also create a new folder based on your requirement. To do so, click the New button, as shown highlighted in red within Figure 3, above. This brings up the New Collection dialog box, as shown in Figure 4.
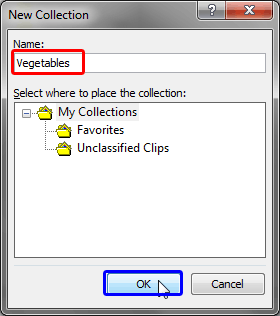
Figure 4: New Collection dialog box - Here, provide the name to your collection. We typed "Vegetables" (shown highlighted in red within Figure 4, above), and then clicked the OK button, as shown highlighted in blue within Figure 4, above.
- This will add the new folder. Now, select this new folder and click the OK button, as shown highlighted in red within Figure 5.
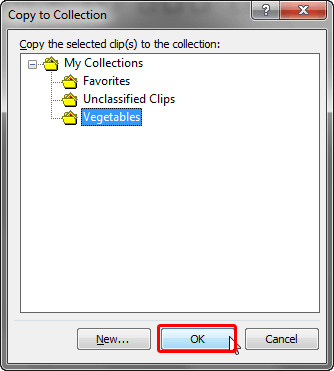
Figure 5: New collection added - This brings up a progress window, as shown in Figure 6 indicating that the chosen picture is being added to the collection.

Figure 6: Progress window - Similarly, add more pictures to your collection.
- Now when you access the Clip Art Task Pane, and deselect the Include Bing Content check-box (as shown in Figure 7, below), you will see that the pictures we saved locally now show up within the search results.
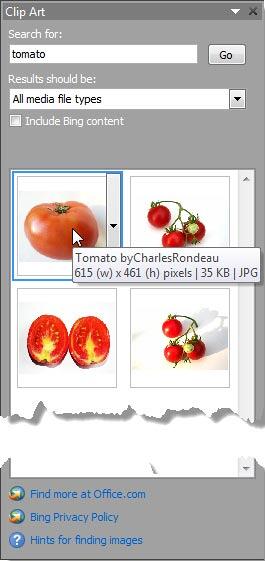
Figure 7: Offline saved content now shows up within local search results - You can also find your saved picture within the Libraries | Pictures folder within Windows Explorer (press the Windows + E shortcut key in newer versions of Windows), as shown in Figure 8. You can insert these pictures within PowerPoint.
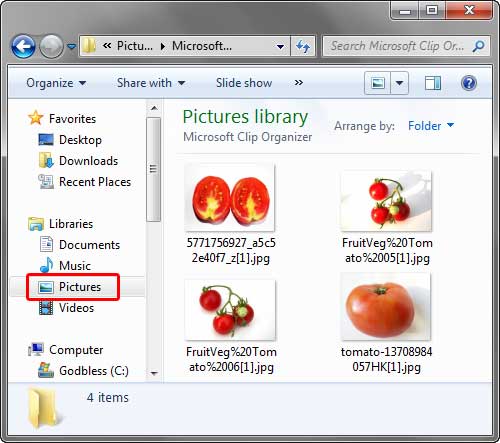
Figure 8: Libraries | Pictures folder - You can even find these images within the Microsoft Clip Organizer, as shown in Figure 9. To learn more, see our Clip Organizer in PowerPoint 2010 tutorial.
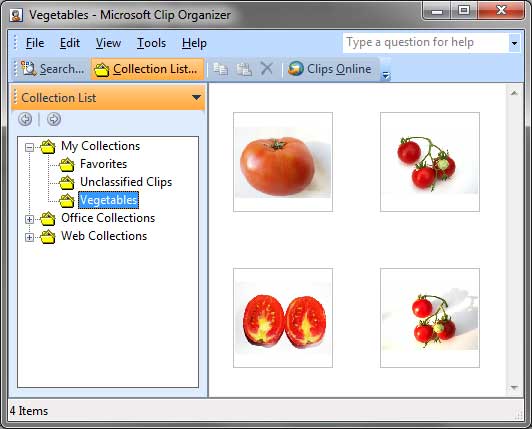
Figure 9: Microsoft Clip Organizer - Save you presentation often.


