When you insert an audio clip into a PowerPoint slide, you can control its volume, set it to play looped, or even hide the audio icon. These are some of the advanced options available for any inserted audio clip in PowerPoint. Remember that these advanced options only exist so that you can use them when they are required, rather than using them just because they exist!
Follow these steps to explore advanced audio options in PowerPoint 2013 for Windows:
- Open your presentation, and navigate to the required slide where you have already inserted an audio clip. Select or double-click the audio clip to bring up the two contextual Audio Tools tabs in the Ribbon. These two tabs are Format and Playback. Click the Playback tab to activate it, as shown highlighted in red within Figure 1, below.

Figure 1: Audio Tools Playback tab of the Ribbon
Contextual Tab
- The Audio Tools Format and Audio Tools Playback tabs are Contextual tabs. Contextual tabs are special tabs in the Ribbon that are not visible all the time. They only make an appearance when you are working with a particular slide object which can be edited using special options.
- Within the Audio Tools Playback tab, locate the Audio Options group, as shown in Figure 2, below.

Figure 2: Advanced audio options within the Audio Tools Playback tab - Within this group, you'll find the advanced audio options. Let us explore them as marked in Figure 2, above:
A. Volume
- This button enables you to set the volume for your audio clip. Click the down-arrow within the Volume button to open the Volume drop-down gallery, as shown in Figure 3. Within the Volume drop-down gallery choose one of the following options: Low, Medium, High, and Mute.

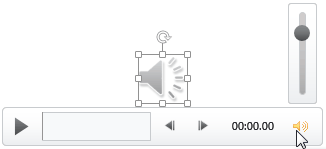
Figure 3: Volume drop-down gallery - Note that you are restricted to set the volume at only the Low, Medium, and High levels within the Volume drop-down gallery. On the other hand, you can set the volume to any level you want by clicking on the Volume button on the Player Controls bar below the actual audio icon on the slide. The Volume option is located towards the right side of this bar, as shown in Figure 4, below.

Figure 4: Volume button in the Player Controls bar B. Start
- Here, you can specify how you want your audio to start during your presentation. Click the Start option to bring up a drop-down list, as shown in Figure 5, below.

Figure 5: Start drop-down list - There are three options within the Start drop-down list:
Automatically
- Play your audio when the slide (containing the audio) appears in Slide Show view, automatically.
On Click
- Plays your audio by clicking on the audio itself in Slide Show view.
C. Play Across slides
- Select this check-box to play your audio across the slide. You can learn more about this option in our Sound Across Slides in PowerPoint 2013 tutorial.
D. Loop until Stopped
- Plays your audio repeatedly and continuously when the active slide is shown.
E. Hide During Show
- Select this check-box to hide your audio clip graphic in Slide Show view. This option makes sense only if you set the Start option for the audio to be Automatically or Play across Slides. On the other hand, if you choose On Click, you should never pair that with selecting the Hide During Show check-box. If you do so, you won't be able to see anything you can click!
F. Rewind after Playing
- Select this check-box to rewind your audio once it has played during your presentation. This can be useful if you need to play an audio clip more than once while you are still presenting the same slide which contains that audio clip.
- Choose options based on your requirements. Make sure to save your presentation often.


