Indezine Logo


Align Shapes in PowerPoint 2016 for Windows

Learn how to align shapes in PowerPoint 2016 for Windows. Placing slide objects properly-aligned will help create an aesthetic slide.


Author:

Product/Version: PowerPoint 2016 for Windows

OS: Microsoft Windows 7 and higher


Learn PowerPoint

Presentation Management 08: Increases Productivity


Creative freedom may require no aligning of objects on a slide geometrically. Indeed, you may want everything placed in an organic, non-aligned manner. Ultimately, the decision to align can differ on a case-by-case basis. Sometimes, alignment works, and at other times, an unaligned bunch of shapes looks perfectly natural and organic, as you can see in the two different examples shown in Figure 1, below.

Alignment works great many times, but is better not done at other times
Figure 1: Alignment works great many times, but is better not done at other times

Look closely again at Figure 1, and you'll tend to agree that the bunch of circles on the right seems to follow a natural S curve and aligning them all in the same straight line would not benefit at all. On the other hand, the bunch of rectangles on the left certainly benefits from being aligned in a straight line.

Also, remember that alignment works with more than just shapes, and you can also combine shapes with other slide objects and align them all together. Now for those times when you place shapes on a PowerPoint slide anywhere you want, and then you need these shapes to be arranged in a straight line.

Follow these steps to align shapes and other slide objects PowerPoint 2013 for Windows:
  1. Open your presentation in PowerPoint, and navigate to the slide which contains shapes to be aligned, and select all shapes that you want to align.
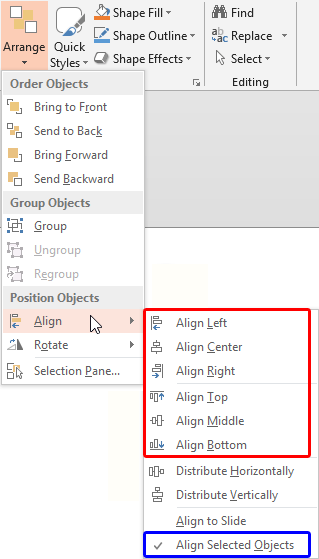
  2. Access the Home tab of the Ribbon, and click the Arrange button. You'll find the Align option in the resultant gallery. Clicking this option brings up the Align sub-gallery, as shown in Figure 2, below.
  3. Align Options on the QAT

  4. If you use the Align tools often, consider adding them to your Quick Access Toolbar by customizing it.
  5. Align sub-gallery
    Figure 2: Align sub-gallery
  6. Align Selected Objects?

  7. Before you begin aligning shapes, make sure the Align Selected Objects option is activated in the Align sub-gallery, as shown highlighted in blue within Figure 2, above.
  8. The Align sub-gallery provides six align options, as shown highlighted in red within Figure 2, above:
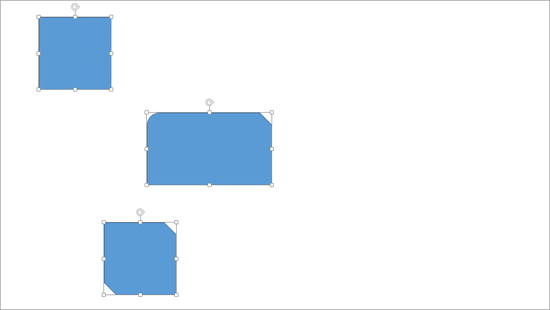
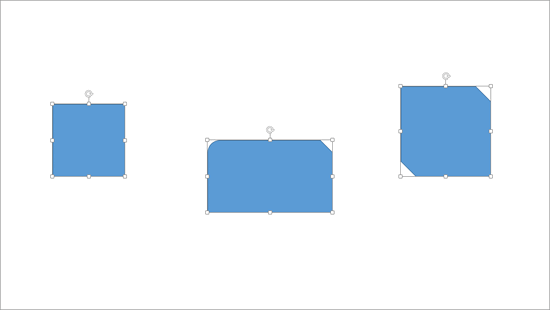
  9. The Align Left, Align Center, and Align Right options work with shapes and slide objects suitable for vertical alignment on the slide, as shown in Figure 3, below.
  10. Shapes placed for vertical alignment on the slide
    Figure 3: Shapes placed for vertical alignment on the slide
  11. Align Left

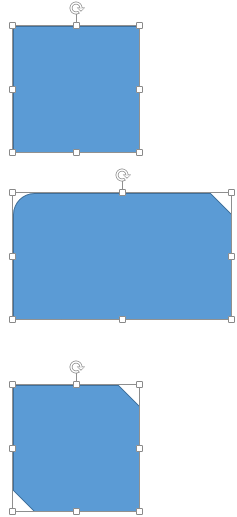
  12. The left-most shape within the selection determines the left point for alignment of all shapes, as shown in Figure 4, below.
  13. Shapes aligned to left
    Figure 4: Shapes aligned to left
  14. Align Center

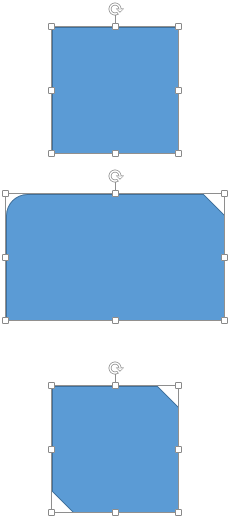
  15. This Align Center option calculates the center of all objects in the selection, by first determining the left-most and right-most points, and then determining the center between those end points. This command will align all shapes vertically along their centers, as shown in Figure 5, below.
  16. Shapes aligned to center
    Figure 5: Shapes aligned to center
  17. Align Right

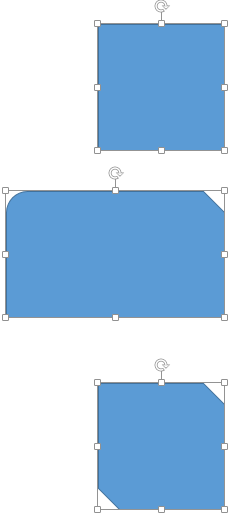
  18. The right-most shape within the selection determines the right point for alignment of all shapes, as shown in Figure 6, below.
  19. Shapes aligned to right
    Figure 6: Shapes aligned to right
  20. The Align Top, Align Middle, and Align Bottom options are suitable for selected shapes and other slide objects, placed horizontally on the slide, as shown in Figure 7, below.
  21. Shapes placed for horizontal alignment on the slide
    Figure 7: Shapes placed for horizontal alignment on the slide
  22. Align Top

  23. The top-most shape within the selection determines the top point for alignment of all shapes, as shown in Figure 8, below.
  24. Shapes aligned to top
    Figure 8: Shapes aligned to top
  25. Align Middle

  26. This Align Middle option calculates the middle of all objects by determining the top-most and bottom-most points, and then determining the middle between those end points. This command will align all shapes horizontally along their middles, as shown in Figure 9, below
  27. Shapes aligned to middle
    Figure 9: Shapes aligned to middle
  28. Align Bottom

  29. The bottom-most shape within the selection determines the bottom point for alignment of all shapes, as shown Figure 10, below.
  30. Shapes aligned to bottom
    Figure 10: Shapes aligned to bottom
  31. Don't forget to save your presentation often.

Smart Guides for Alignment

The steps explained above show the alignment technique by using the Arrange | Align options. You can also easily align shapes using the Smart Guides option in PowerPoint.


See Also:

06 05 02 - Aligning and Distributing Shapes: Align Shapes in PowerPoint (Glossary Page)

Align Shapes in PowerPoint 2013 for Windows
Align Shapes in PowerPoint 2011 for Mac
Align Shapes in PowerPoint 2010 for Windows

You May Also Like: Flevy Tools: Conversation with David Tang | Ship PowerPoint Templates


Popular Posts

10 Tips for Pecha Kucha
Read 10 amazing Pecha Kucha tips that will help you create and deliver a better Pecha Kucha presentation.

Creating Slide Backgrounds in Photoshop for PowerPoint
Learn how to create slide backgrounds for PowerPoint in Photoshop.

Formatting Arrows (Arrowheads) in PowerPoint 2016 for Windows
Learn how to format arrowheads for lines in PowerPoint 2016 for Windows.

Creating Semi-Circles in PowerPoint 2013
Learn how to create a semi-circle in PowerPoint 2013.


Pictures in Presentations

Is a picture is worth a thousand words? You probably have heard this adage so often that we decided not to repeat this phrase throughout this book! Now here’s some more info: the human brain uses a larger part of its area to store visual information rather than textual content. And that’s possibly because a picture describes so much more than text.

Go and get a copy of our Pictures in Presentations ebook.


Microsoft and the Office logo are trademarks or registered trademarks of Microsoft Corporation in the United States and/or other countries.

Home | PowerPoint | Photoshop | PowerPoint Templates | PowerPoint Tutorials | Blog | Notes | Ezine | Media Kit | Feedback | Site Map | About Us | Contact Us

Link to Us | Privacy | Testimonials

PowerPoint Backgrounds | Christian PowerPoint Backgrounds | Business PowerPoint Presentation Templates

Plagiarism will be detected by Copyscape

©2000-2023, . All rights reserved.