Indezine Logo


Beauty Box Photo 3: Photoshop Plug-in Review

Beauty Box Photo is a plug-in for Adobe Photoshop that lets you make anyone’s skin glow – at least in the picture.


Author:

Product/Version: PowerPoint


Introduction

Beauty Box Photo is a plug-in for Adobe Photoshop that digitally erases skin blemishes and wrinkles, evening out skin tones, and reducing shine, etc. The plug-in gives a very professional output. When the plug-in is summoned, it automatically uses its algorithm to identify skin areas in your picture and then applies skin smoothing. Therefore, use further adjustments to fine-tune results.

Beauty Box Photo is from Digital Anarchy, a company based in San Francisco, USA that specializes in special effect filters for image editing and video programs. Digital Anarchy also creates other Photoshop-compatible plug-ins like 3D Invigorator, Primatte Chromakey 3, ToonIt!, Backdrop Designer, etc.

You can download a free trial version of Beauty Box Photo from the Digital Anarchy site.

My contact at Digital Anarchy for this review was Jim Tierney. Thank you, Jim.

Back


How To Use

We have already reviewed an earlier version of Beauty Box Photo plug-in for Photoshop earlier, and so much has changed since that earlier version. Follow these steps or just read along to do a quick walkthrough of Beauty Box Photo 3. We explore the Automatic options here. But you can also tweak controls manually:
  1. Launch an image editor such as Adobe Photoshop (where you installed the Beauty Box Photo plug-in) and open any picture that includes a face which needs to corrected.
  2. Choose the Filter | Digital Anarchy | Beauty Box option, as shown in Figure 1, below.
  3. Beauty Box Photo plug-in within the Filter menu
    Figure 1: Beauty Box Photo plug-in within the Filter menu
  4. Doing so opens the image within the Beauty Box interface, as shown in Figure 2, below.
  5. Beauty Box interface
    Figure 2: Beauty Box interface
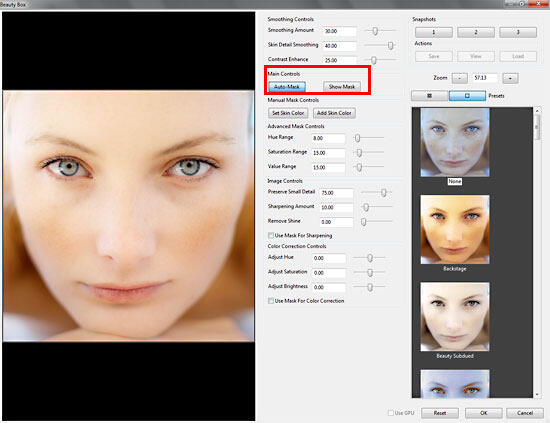
  6. The most important options within Beauty Box Photo 3 are within the Main Controls section, as shown highlighted in red within Figure 2, above:
  7. Auto-Mask

  8. This button is the single most important control in the Beauty Box plug-in. The Auto-Mask analyzes the face in the picture and applies corrections. This button is always on (if the button is grayed, that means it is pressed, and thus active). Unless you turn it off, Auto-Mask will run when you launch Beauty Box and create the initial smoothing mask.
  9. Show Mask

  10. This button displays the mask that has been built.
  11. That's all you need to do! The mask thus created will quite often not need any further adjustments. Still, if you’re not satisfied with the result, you can tweak some parameters.
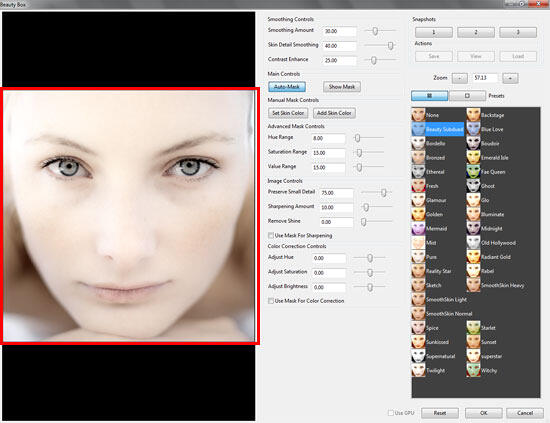
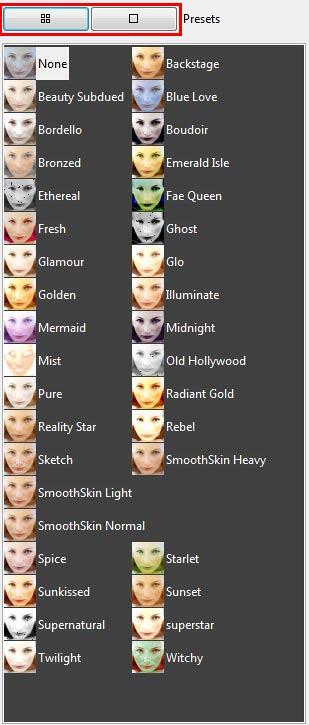
  12. Additionally, you can use any of the ready made presets from the Preset List, as shown in Figure 3, below. Or you can even save your current settings as a preset so that it can be used on many photos of the same model. Click the buttons, highlighted in red within Figure 3, to switch the Presets list between thumbnail and list views.
  13. Preset list in thumbnail view
    Figure 3: Preset list in thumbnail view
  14. For this review, we have used one of the presets. As soon as you select a preset, you can see a preview, as shown highlighted in red within Figure 4, below.
  15. One of the presets applied to the picture
    Figure 4: One of the presets applied to the picture
  16. Once you are happy with the result, click the OK button to apply the changes.

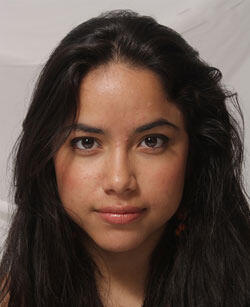
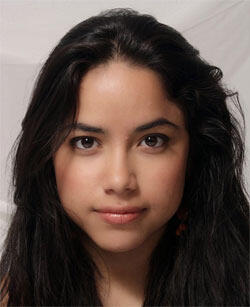
Here are some Before and After samples created using Beauty Box Photo:
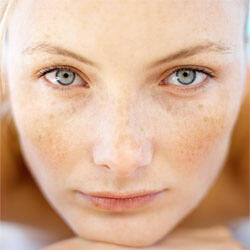
Before and After samples created using Beauty Box Photo    Before and After samples created using Beauty Box Photo

Before and After samples created using Beauty Box Photo    Before and After samples created using Beauty Box Photo

Before and After samples created using Beauty Box Photo    Before and After samples created using Beauty Box Photo

Back


Specifications

Photoshop Versions: Photoshop CS and higher
Platforms: Windows, Mac
Site: Digital Anarchy
Price: USD $77 and above
Trial Version: Available

Back


Photoshop: Digital Anarchy (Glossary Page)

You May Also Like: Presentation Procrastinators: 02 | Compositions PowerPoint Templates


Popular Posts

Creating Slide Backgrounds in Photoshop for PowerPoint
Learn how to create slide backgrounds for PowerPoint in Photoshop.

Formatting Arrows (Arrowheads) in PowerPoint 2016 for Windows
Learn how to format arrowheads for lines in PowerPoint 2016 for Windows.

Creating Semi-Circles in PowerPoint 2013
Learn how to create a semi-circle in PowerPoint 2013.

Apply Two or More Animations to One Object at the Same Time in PowerPoint
Apply multiple animations to one slide object in PowerPoint, and make all animations play together.


Jigsaw Graphics for PowerPoint

Here are 10 jigsaw graphics containing different shapes. These graphics are available in both black and white and are contained within separate sample presentations that you download. Additionally, these jigsaw graphics are vector shapes, so you can easily edit them within your Microsoft Office program by changing fills, lines, and effects or even applying Shape Styles.

Download and use these Jigsaw Graphics in your slides for just $4.99+


Microsoft and the Office logo are trademarks or registered trademarks of Microsoft Corporation in the United States and/or other countries.

Home | PowerPoint | Photoshop | PowerPoint Templates | PowerPoint Tutorials | Blog | Notes | Ezine | Media Kit | Feedback | Site Map | About Us | Contact Us

Link to Us | Privacy | Testimonials

PowerPoint Backgrounds | Christian PowerPoint Backgrounds | Business PowerPoint Presentation Templates

Plagiarism will be detected by Copyscape

©2000-2023, . All rights reserved.