Insert Slide Numbers on your slides, and you may discover that the
location of the Slide Number changes depending upon the active Theme of your slides. With some
Themes, the Slide Number may be placed at the bottom right -- with other Themes, it may be located at the top right (highlighted in
red within the slide on left in Figure 1, below), or even the bottom center (highlighted in
red within the slide on right in Figure 1, below). As you can observe, the location of the Slide Number may
seem to be influenced by the Theme -- and that's almost true. However, a Theme is a larger concept -- it's only the
Slide Master within your Theme that's influencing the position
of your Slide Numbers.

Figure 1: Applying a different Theme may change the position of Slide Numbers
Follow these steps to learn more:
- Launch PowerPoint. You'll find that PowerPoint typically opens a blank presentation with the Office Theme applied. You can see the name
of the active Theme within the
Status Bar as highlighted in red within Figure 1, below. If you see another Theme name here, make sure you apply the Office Theme since this is a basic, clean Theme that lends itself best to changes and edits that we discuss later in this tutorial. If you do not know how you can apply a Theme, explore our Applying Themes in PowerPoint, Word, and Excel 2010 tutorial.
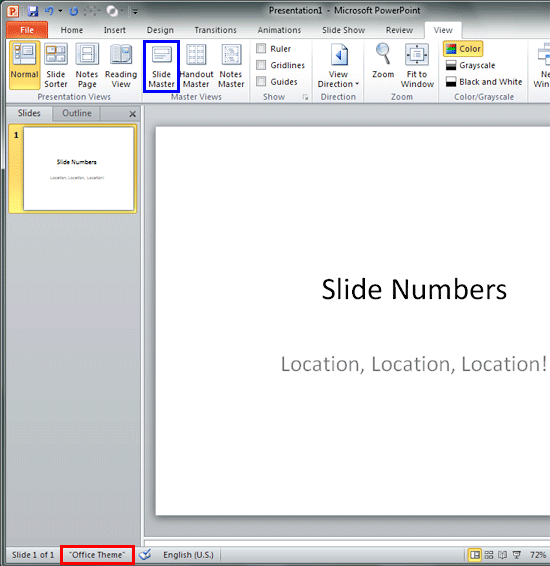
Figure 2: Presentation based on the Office Theme
- Next make sure that you insert Slide Numbers on your slide -- this is an easy process already explained in our
Working with Slide Number tutorial. You'll end up with the slide
number visible on your slide (highlighted in red within Figure 3, below).
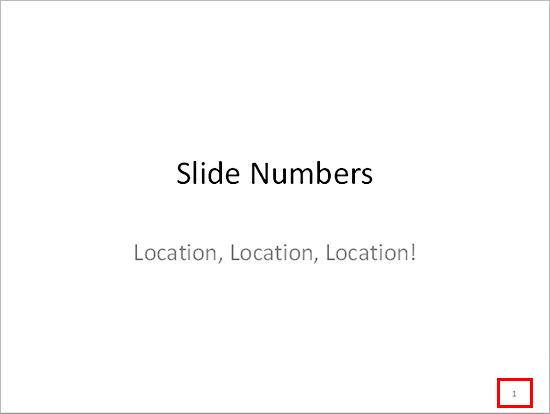
Figure 3: Slide Number on the slide
- Now access the View tab of the Ribbon -- and
within the Master Views group, click the Slide Master button, as shown highlighted in blue within Figure 2 (previously on this page).
- This opens the Slide Master view, as shown in Figure 4. In Slide Master view, you'll find that the left pane contains two distinctly different elements: a larger thumbnail representing the Slide Master (highlighted in red
within Figure 4) and several smaller slide thumbnails below representing individual Slide Layouts (highlighted in blue within Figure 4).
 a
a
Figure 4: Slide Master view within PowerPoint
Note: In hierarchy terms, Slide Layouts are dependent for their appearance on the Slide Master although you can individually override these dependencies.
- Now make sure you select the Slide Master (highlighted in red
within Figure 4, above). And notice the location of the Slide Number placeholder, as shown highlighted in red
within Figure 5, below.
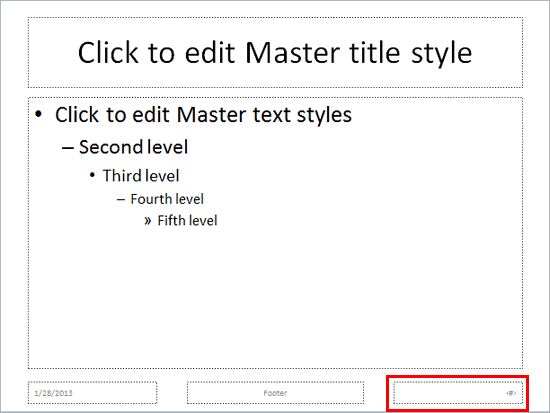
Figure 5: Slide Number placeholder
Tip: Cannot see any Slide Number placeholder? Thereafter, within the Slide Master tab of the Ribbon, click the Master Layout button. In the resultant dialog box, select the Slide number check-box as shown in Figure 6, below.
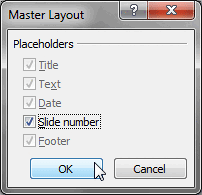
Figure 6: Slide number check-box to be selected
- Now you can reposition and resize the Slide Number placeholder as required. In Figure 7, below you can see that the Slide Number placeholder is repositioned to the top of the Slide Master (highlighted in red
).
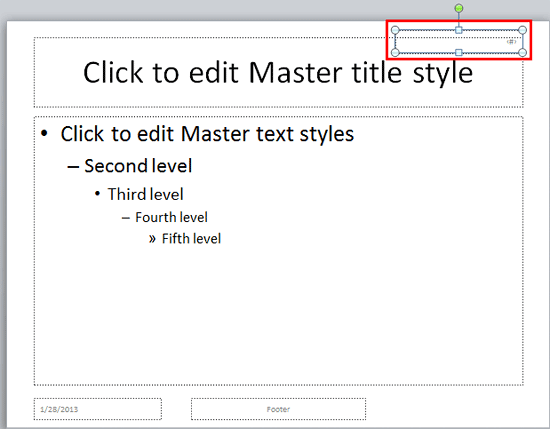
Figure 7: Slide Number placeholder repositioned
Tip: Want to know more about how you can reposition and resize the Slide Number placeholder? Explore our Reposition and Resize tutorials -- the linked tutorials pertain to text boxes, but the concepts are identical.
- If you want to have a different location for the Slide Number in any particular Slide Layout, you can optionally make those changes now -- remember that any changes you make in individual Slide Layouts will override the Slide Master. Typically you will find a Slide Number placeholder located in the same position in all layouts -- edit as required. If you want the layouts to behave just like the Slide Master though, don't edit the Slide Number placeholder within your Slide Layouts.
- When done, access the Slide Master tab of the Ribbon, and click the Close Master View button as shown highlighted in red
within Figure 8. This will get you back to Normal View.

Figure 8: Close Master View button
- You'll now see the Slide Number in a different location on your slide, as shown in Figure 9, below-- compare the slides shown in Figures 3 and 9.
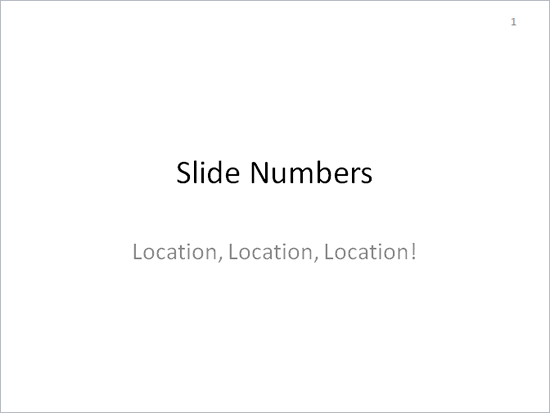
Figure 9: Slide Number repositioned
Tip: Still cannot see Slide Numbers? Make sure you insert them -- the Slide Master only influences the location of the Slide Numbers -- it does not insert them. Learn how to enable the Slide Numbers in our Working with Slide Number tutorial.
- Save your presentation.


 a
a


