Working with pictures in PowerPoint 2013 for Windows can be so much fun and fulfilling at the same time. One of the coolest options is to recolor the hue of your entire picture so that it looks almost like a duotone picture. You have already learned how to apply corrections to your inserted pictures, and this Color option can help you do more with your pictures. Be aware though that this Color option does not work like a coloring book; rather it changes the overall hue color of the entire picture, saturates color values, changes the overall color tone, and does more.
Follow these steps to learn more:
- Open your presentation, and navigate to the required slide. Insert a picture, or if you already have a picture on your slide, just double-click it to activate the Picture Tools Format tab of the Ribbon, as shown in Figure 1 (highlighted in red).
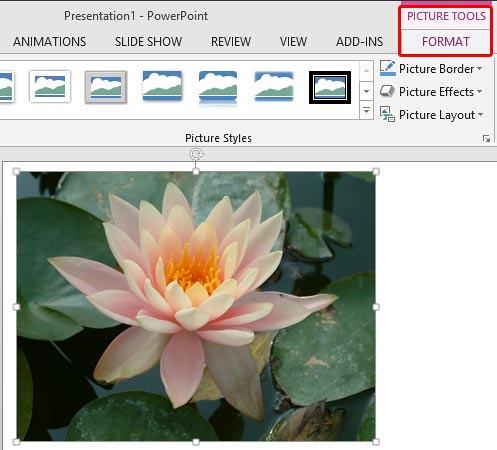
Figure 1: Picture Tools Format tab of the Ribbon Note: The
Picture Tools Format tab is a
Contextual tab. These tabs are special tabs in the
Ribbon that are not visible all the time. They only make an appearance when you are working with a particular slide object which can be edited using special options.
- Within the Picture Tools Format tab, click the Color button (highlighted in red within Figure 2) to access the Color drop-down gallery that you can see in Figure 2.
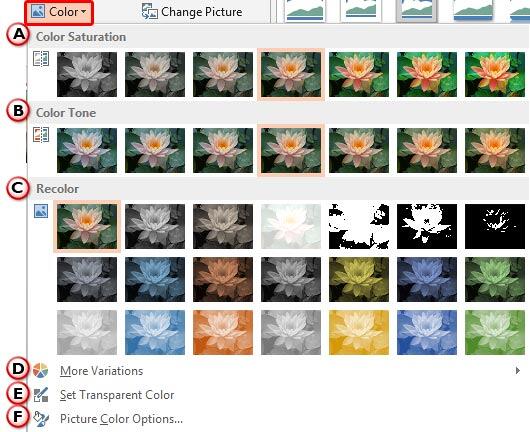
Figure 2: Color drop-down gallery - In Figure 2, you can see that the Color drop-down gallery sports three sections: Color Saturation, Color Tone, and Recolor which include preview thumbnails of the selected picture variants. To select any of the variants, just click on it. In addition to these sections, you can also see three more options within the Color drop-down gallery. These are used to color the selected picture. Let us explore all of Color drop-down gallery contents one by one, as marked in Figure 2 above:
A. Color Saturation
- This section includes thumbnail previews of the selected picture's variants with different pre-applied saturation values. If you hover the mouse cursor over any of these variants, you will see a tool tip that shows the saturation value in percentage, as shown highlighted in red within Figure 3 below.
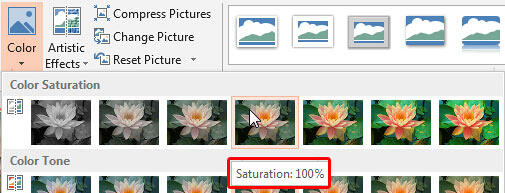
Figure 3: Tool Tip displaying saturation value in percentage B. Color Tone
- Here you'll find thumbnail previews of the selected picture's variants with several temperature values. If you hover the mouse cursor over any of these variants, you will see a tool tip that shows its temperature value (similar to what you saw in Figure 3, above).
C. Recolor
- Tints and shades of accent colors along with grayscale and black and white variants are shown as previews in this group. While the first row is populated by grayscale and black and white variants, the previews in the second and third rows of this section are shades (darker variations) and tints (lighter variations) of Accent colors. Accent colors are influenced by the Theme of the active presentation. So, if the Theme is changed, the colors of these previews in the second and third rows will change. Just hover your mouse cursor on any of the variants in this section to see its name as a tool tip.
D. More Variations
- This option, when selected opens a sub-gallery, as shown in Figure 4.
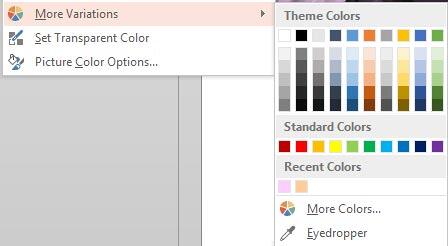
Figure 4: More Variations sub-gallery - Within the More Variations sub-gallery you'll get four sections, which are explained below:
Theme Colors
- Here you can select any of the colors which are from the active Theme of the presentation. You can also select any of the 5 tints or shades for any Theme color. Learn more about Themes here.
Standard Colors
- Here you can choose from any of the ten standard colors. These ten standard colors are just choices of colors that PowerPoint believes to be widely used. You don't have to limit yourself to either the Theme colors or Standard colors, as we'll show you in the next options. It's a good design idea to use Theme colors as far as possible.
Recent Colors
- Here you can find the colors most recently used. If you have just launched PowerPoint and created a new presentation, the Recent Colors option may be entirely absent since you haven't selected any color recently!
More Colors
- This option is to summon the Colors dialog box as shown in Figure 5 . This dialog box has two tabs: Standard and Custom. First select the Standard tab (again, refer to Figure 5).

Figure 5: Standard tab within the Colors dialog box - This tab offers 127 colors in a honeycomb style palette, including 14 gray shades, black and white. You can even change the transparency value of the selected color in the Transparency slider below. If you want more color choices, then select the Custom tab of the same dialog box, as shown in Figure 6.
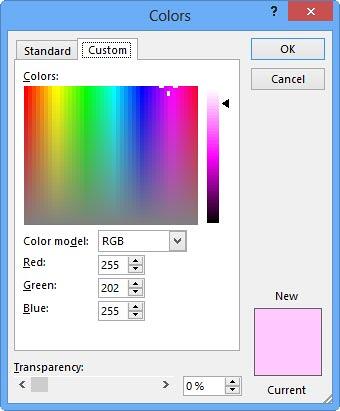
Figure 6: Custom tab within the Colors dialog box - In this tab, you can choose any color from the spectrum and later adjust the selected color's luminosity with the slider on the right. You can even enter specific RGB or HSL values to create a specific color; all these combinations provide over 16 million color choices.
- Again, you can even change the transparency value of the selected color in the Transparency slider below.
- Choose any color and click the OK button to apply the changes.
Note: When you move your cursor over different previews, within the
Color Saturation,
Color Tone, and
Recolor sections, and over the options within the
More Variations sub-gallery, the selected picture shows a
Live Preview of the variation (or option).
Eyedropper
- This new option in PowerPoint 2013 enables you to pick an exact color from anywhere, sometimes even from somewhere outside PowerPoint. Explore our Eyedropper Option in PowerPoint 2013 tutorial to learn more.
E. Set Transparent Color
- If you want a particular color in the selected picture to be made transparent, this option comes to your help. First, select this option. The cursor shows a slanted arrow in place of a four directional arrow, as shown in Figure 7 (highlighted in red).
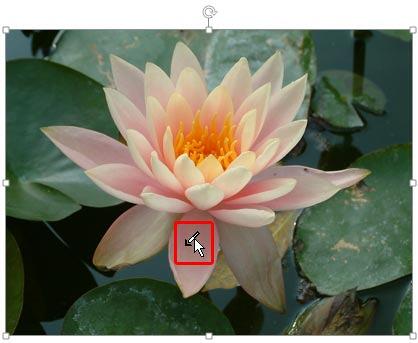
Figure 7: Cursor changes when Set Transparent Color option is selected - Place this cursor on the picture color you want to make transparent, and click. This will make all those areas in the picture 100 percent transparent. Note that all picture types won't support this option. Typically, this option works with bitmaps, and not vector images.
F. Picture Color Options
- This is the last option within the Color drop-down gallery which takes you to the Picture Color option within the Format Picture Task Pane that you can see in Figure 8.

Figure 8: Picture Color options within the Format Picture Task Pane - Here, you can select any of the preset Color types (same as in Color section within drop-down gallery), and also, make changes to the Saturation and Temperature values using sliders or by directly typing in the values in digits, as required. Once done, close the task pane.
- Recolor the picture by selecting any thumbnail preview variant, or using the Color options within Format Picture Task Pane. In Figure 9 you can see the selected picture after it has been recolored. Compare pictures in Figures 9 and 1 to see the difference.
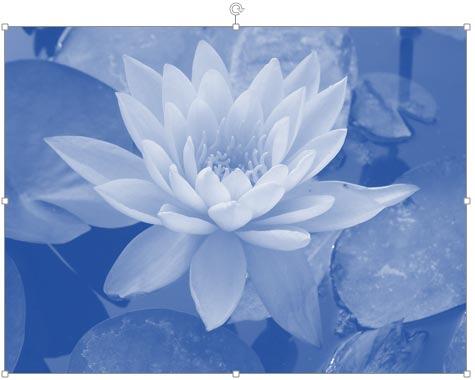
Figure 9: Selected picture recolored - Save your presentation often.


