When you insert a picture on your PowerPoint slide, there may be situations when you feel that the picture needs some corrections. Maybe the picture is too dark or too bright, and you want to give it an average look. Sometimes, you may want to make some tonal changes to it so that it stands apart. In this tutorial, you will learn how to make corrections to the pictures in terms of its brightness, sharpness, softness, and contrast values.
Follow these steps to correct pictures in PowerPoint 2011 for Mac:
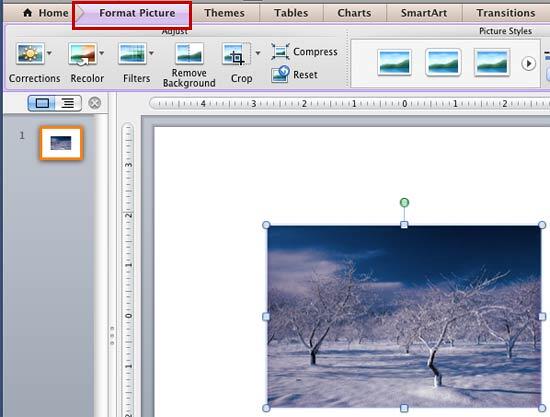
- Open your presentation, navigate to the required slide, and insert a picture. If you already have a picture on your slide, just select it and double-click to activate the Format Picture tab of the Ribbon as shown in Figure 1 (highlighted in red).

Figure 1: Format Picture tab of the Ribbon activated Note: The
Picture Tools Format tab is a
Contextual tab. These tabs are special tabs in the
Ribbon that are not visible all the time. They only make an appearance when you are working with a particular slide object which can be edited using special options.
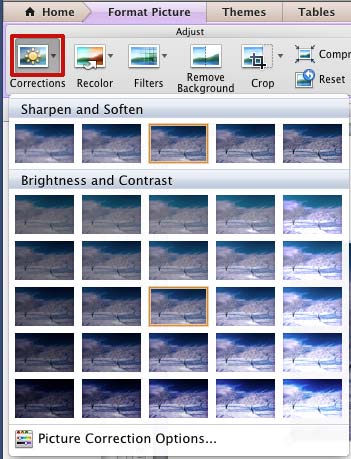
- Within the Format Picture tab, locate the Adjust group. Here, you will find several options that let you adjust your pictures. Click the Corrections button (highlighted in red, in Figure 2) to access the Corrections drop-down gallery that you can see in Figure 2.

Figure 2: Corrections drop-down gallery - This gallery displays the preview thumbnails of the selected picture variants with different sharpness, softness, brightness, and contrast values. These previews have been placed into two sections:
Sharpen and Soften
- Displays previews with different sharpness and softness values. The highlighted thumbnail in the middle represents the current status of the picture.
Brightness and Contrast
- Displays previews with different brightness and contrast values. Again, the highlighted thumbnail in the middle represents the current status of the picture.
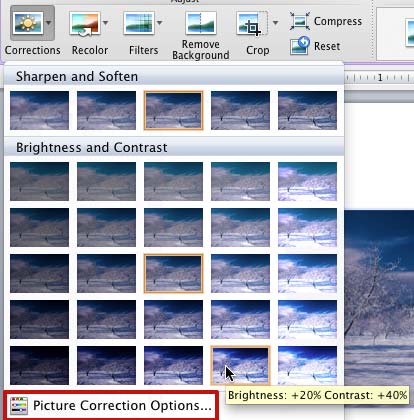
- If you hover the mouse cursor over any of the picture variants, you will see a tool tip as you can see in Figure 3, which displays the adjustment values of the particular variant.

Figure 3: Brightness and Contrast values displayed in the tool tip - Click on any of the variants to apply different correction values to the selected picture.
- At this point, if you are happy with the effect, you can continue with it. Otherwise, if you want to fine-tune the effect further, open the Corrections drop-down gallery once again, and select the Picture Correction Options, the last option in this gallery (highlighted in red, in Figure 3 above), to summon the Format Picture dialog box.
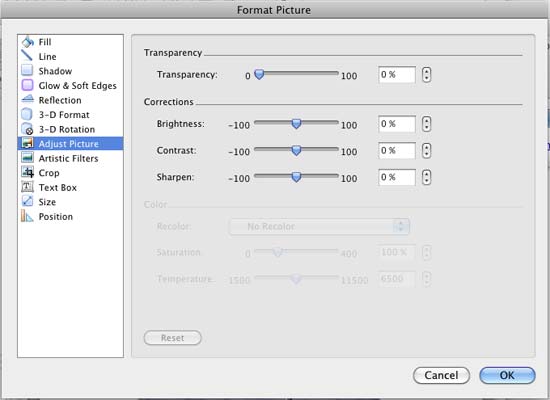
- In this dialog box, make sure that the Adjust Picture option is selected in the slidebar as you can see in Figure 4. Note that in Figure 4, the options that are not related to Corrections have been grayed out. These options will be discussed in detail when we explain the Recolor options in a subsequent tutorial.

Figure 4: Picture Correction options within the Format Picture dialog box - Now, make changes to the Transparency, Brightness, Contrast, and Sharpness values as required. You can either use the sliders or directly type in the values in digits, as required.
- Once you have fine-tuned the effect using the options within the Format Picture dialog box, click OK to apply the changes and get back to the slide. Figure 5 shows the selected picture with changed brightness and contrast values. Compare Figures 1 and 5 to see the difference.

Figure 5: Picture with changed brightness and contrast values - Save your presentation.


