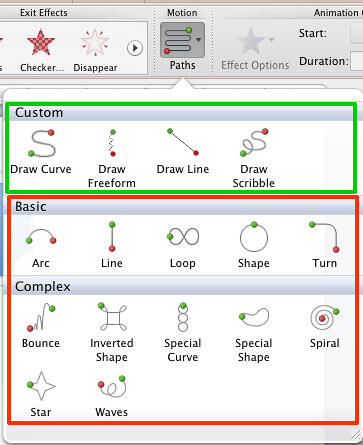
Applying a Motion Path animation to any PowerPoint slide object is as simple as applying another animation effect such as the Entrance, Emphasis, or Exit. It is especially simple if you choose a Motion Path animation from within the Basic or Complex categories, as shown highlighted in red within Figure 1, below, within the Motion Paths drop-down gallery.

Figure 1: Motion Paths drop-down gallery
However, if none of the Motion Path animations in the Basic or Complex categories suit your needs, or if you find it difficult to edit them, you can always opt to draw your own Motion Path by choosing any of the four options available within the Custom category, as shown highlighted in green within Figure 1, above. In this tutorial, we'll show you the various Custom Motion Path animations available in PowerPoint 2011 for Mac, and how you can use them to draw your own custom motion paths.
Follow these steps to access this option, and to create your own motion path in PowerPoint 2011 for Mac:
- Select the object that you want to animate. You can select any object on your slide. We created and selected a shape.
- Alternatively, if you want to follow this tutorial step-by-step, launch PowerPoint. You will see the Presentation Gallery which allows you to set all attributes of your new presentation, such as a preset Theme or Template. Make selections, or click Cancel in this gallery to open a blank presentation with a new slide. PowerPoint 2011 users can change the slide layout of this slide to Blank by selecting Layout | Blank option within the Home tab of the Ribbon. Then, insert a shape and select it.
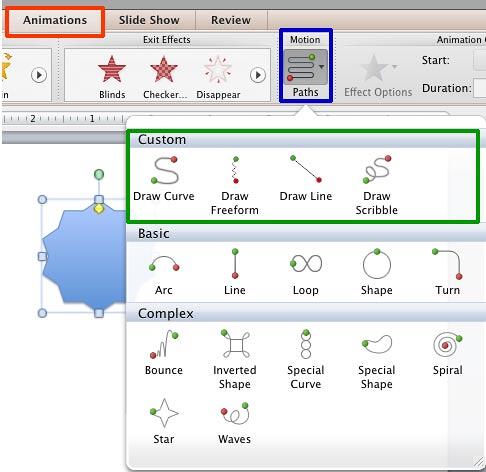
- We inserted a 10-Point Star shape, as shown in the Slide Area in Figure 2, below. With the star still selected, click the Animations tab of the Ribbon, as shown highlighted in red within Figure 2. Within this tab, click the Motion Paths button, as shown highlighted in blue within Figure 2. Doing so opens the Motion Paths drop-down gallery that contains the three categories, we already explored earlier in this tutorial: Custom, Basic, and Complex.

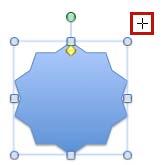
Figure 2: Custom Motion Paths within the Motion Paths drop-down gallery - Among the three categories within Motion Paths drop-down gallery, the Custom category, as shown highlighted in green within Figure 2, above includes the line drawing tools that allow you to manually draw your own Motion Paths. Click on any of them and you will see the cursor changing to a crosshair, as shown highlighted in red within Figure 3, indicating that the drawing mode is active.

Figure 3: Crosshair cursor indicates that the drawing mode is active - Here, are some guidelines which will help you in drawing a custom motion path:
Draw Curve
- Select this option to draw a curved motion path. Once selected, click at the position where you want to establish the starting point of your custom motion path. Then move the cursor a little afar and click again to establish a new point. At this point, a curve will be created. Keep creating points like this wherever you want to define a curve. Double-click when you are finished. You can learn more about drawing curves in our Drawing Curved Lines in PowerPoint 2011 for Mac tutorial. Although that tutorial discusses curves as shapes, the concepts of drawing curved paths remains the same.
Draw Freeform
- Select this option to draw a freeform motion path. Once selected, click at the position where you want to establish the starting point of your custom motion path. Then, to create straight lines, just move the mouse (don't drag) and click in a different place on the Slide Area. A straight line will appear between these points. If you want to create non-straight lines, click and drag. Double-click when you are finished. You can learn more about drawing freeform lines in our Drawing Freeform Lines in PowerPoint 2011 for Mac tutorial. Although that tutorial discusses freeform lines as shapes, the concepts of drawing freeform paths remains the same.
Draw Line
- Select this drawing tool to create a straight lined motion path. Once selected, click where you want to establish the starting point of your custom motion path. Then hold down the left mouse button, don't release it yet, and start dragging the cursor deciding the direction and length of your motion path. Finally, release the mouse button to establish the end point. You can learn more about drawing straight lines in our Drawing Lines in PowerPoint 2011 for Mac tutorial. Although that tutorial discusses straight lines as shapes, the concepts of drawing straight line paths remains the same.
Draw Scribble
- Select this drawing tool to draw a scribble motion path. Once you have selected the Draw Scribble tool, note that the cursor changes to a pencil. Now, click where you want to establish the starting point of your custom motion path. Without releasing the mouse button, start drawing the path by dragging the mouse. Draw on the slide with the mouse button held down. Release the mouse button when you are done with drawing your Motion Path. You can learn more about drawing scribbles in our Drawing Scribble Lines in PowerPoint 2011 for Mac tutorial. Although that tutorial discusses scribbles as shapes, the concepts of drawing scribbled paths remains the same.
- Whichever path you are drawing, make sure you establish the starting point of the custom motion path exactly at the position where you want to begin the animation. Most of the time, this is the position of your slide object, although you can choose to establish the start point elsewhere as well.
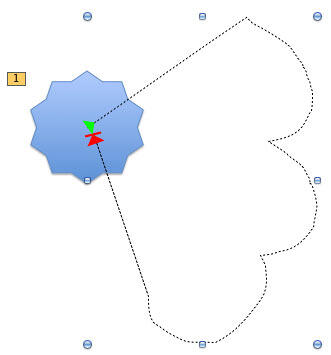
- As soon as you finish drawing the motion path, the selected slide object will immediately animate to show the preview of the newly drawn Motion Path. Once the animation preview stops, you will be able to see your newly drawn motion path indicated by the dotted line. You will also see that the start point will be indicated by a green arrow, and the end point will be similarly indicated by a red arrow, as shown in Figure 4, below.

Figure 4: Custom Motion Path completed - Save your presentation often.


