Several times in my training sessions, we have been asked how one can create a flag in a PowerPoint slide? Of course, you can just use some clip
art or, if you are good at Adobe Illustrator or some other similar graphic
software, creating a flag is a piece of cake. However, the challenge is to how one can create a flag in PowerPoint – this is a very relevant question
since most business users, who need stuff such as flags don’t have access to dedicated graphic programs.
Creating a flag in PowerPoint is extremely easy – just follow these steps:
- Create a new presentation, or just add a new slide to an existing presentation.
Change its layout to Blank so that you don’t have any
obstructing text placeholders.
- Now access the Shape gallery, and choose the Wave
shape within the Stars and Banners category. Drag and draw a Wave shape on your slide (see
Inserting Shapes), as shown in Figure 1 below.
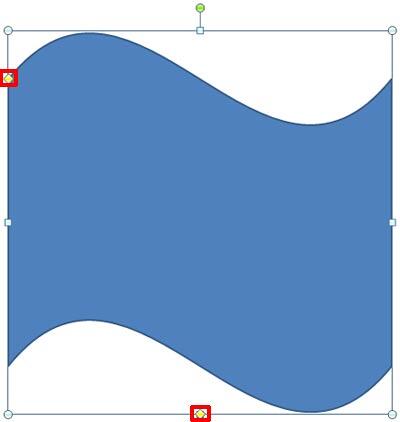
Figure 1: Wave shape inserted on the slide- When you select the Wave shape, notice that you can see two yellow diamond handles (highlighted in red
within Figure 1, above).
- Manipulate these diamond handles -- drag the top left diamond upwards a wee bit.
Ignore the bottom diamond. Rotate the shape a little leftwards – you'll end up with a shape as shown
in Figure 2.
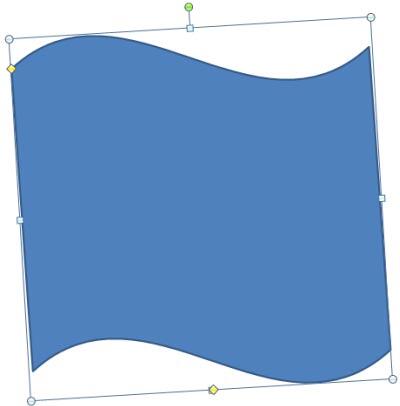
Figure 2: Wave shape resized and rotated- With the shape selected, access the Edit Points option. You can see the vertexes
(points), as shown in Figure 3.
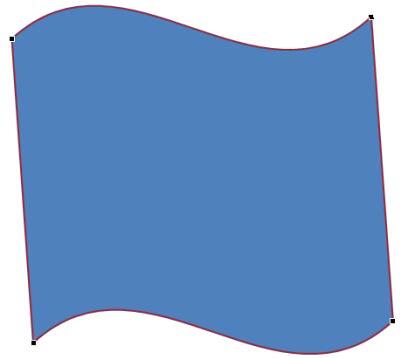
Figure 3: Wave shape in Edit Points mode- Select the bottom-right corner point, and delete this point. You will end up
with the shape you see in Figure 4.
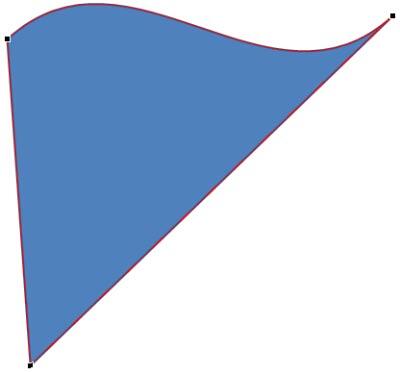
Figure 4: Wave shape after deleting the bottom-right corner point- Select the top-right point, so that you can see the two blue handles for the point (marked as 1 and 2 within
Figure 5).
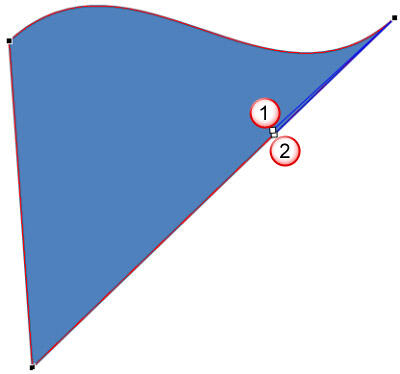
Figure 5: Two blue handles appear when a corner point is selected- Click and drag the white squares that are located towards the end of these blue handles so that the blue handles are in the positions you see in
Figure 6, below.
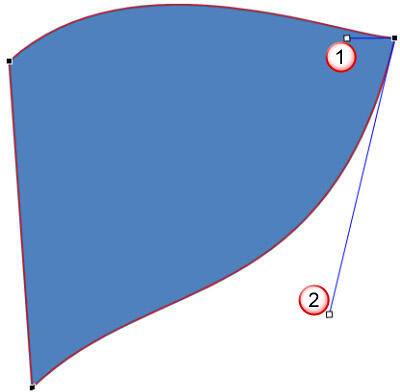
Figure 6: Blue handles repositioned to alter the look of Wave shape- Your flag is ready – you can add fills, lines, and effects for the flag
-- you can also add text within the flag (see Figure 7, below). You can also
align and resize text as required.

Figure 7: Text added into the flag- In addition, you can add a flag staff by drawing a thin rectangle on the left, and then
resizing the rectangle thin enough. This flag staff needs to be slightly
rotated to match the orientation of the flag (see Figure 8, below).

Figure 8: Flag with staff added- Once you get the desired result, save your presentation.


