Type text within your PowerPoint slide, and its font type and size are decided based on the
Theme applied to your presentation. For example, if you use PowerPoint's default
Office Theme, then all your typed text will sport the Calibri typeface. You can quickly change
the Theme Fonts set altogether for your presentation, and all text instances will switch to the default typefaces of the new
Theme or Theme Fonts set. However, there may be times when you want to override these defaults and choose a typeface that is
different, or even a different font size. In this tutorial, we use the terms typeface and font type interchangeably. Let us now
explore how you can choose different font types and change the font size of the selected text on
the slide in PowerPoint 2016 for Windows:
- Create a new presentation and type some text in the placeholder, as shown in Figure 1.
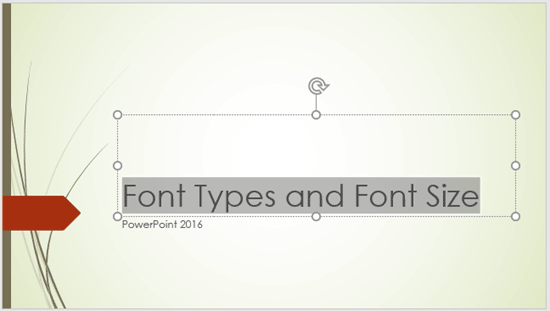
Figure 1: Text selected on the slide
- Select the text which you want to format
(refer to Figure 1, above). Now, navigate to the Home tab of the
Ribbon and locate the Font group,
as shown highlighted in red within Figure 2.

Figure 2: Font group within the Home tab of the Ribbon
- Within the Font group, click the down-arrow located next to Font option, as shown
highlighted in red within Figure 3. This brings up the Font
drop-down gallery, as shown in Figure 3.
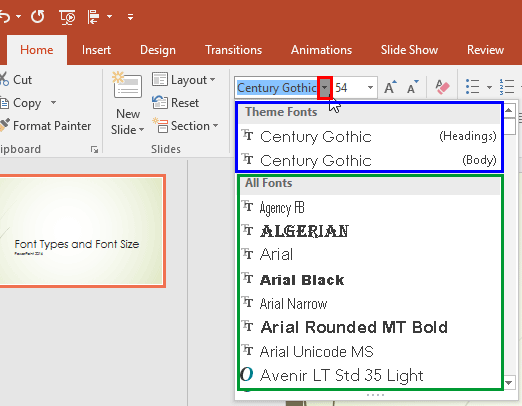
Figure 3: Font drop-down gallery
- As you can see in Figure 3, above the Font drop-down gallery is divided into
two sections:
-
Theme Fonts, highlighted in blue, within
Figure 3 above, displays the active font types of your presentation.
-
All Fonts, displays all fonts installed on the system, highlighted in
green within Figure 3, above.
- To change the font type from the default Theme Fonts to some other font, first select the text. Thereafter, open the
Font drop-down gallery shown in Figure 3, scroll down and choose any font type from within
the All Fonts section. As you hover your cursor over any of the font types you'll see a
Live Preview of fonts changing on the active
slide. Figure 4 below shows a different font type, Stencil being selected (highlighted in
red within Figure 4), and also a live preview of this font type on the selected
text can be seen within the Slide Area. Compare
slides shown in Figures 4 and 1. Click on the font type (as opposed to hovering over it) within
the drop-down gallery to apply it to the selected text.
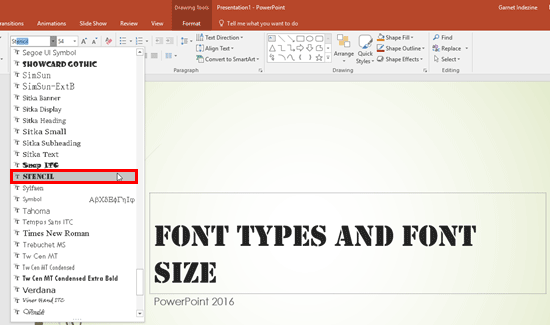
Figure 4: Stencil font type being selected
- Alternatively, you can directly type the name of the font within the Font box, as shown highlighted in
red within Figure 5. Start typing the first few alphabets of the font you want to
use. For example, when we typed Ste, we could locate Stencil. Once the font name is active
(see Figure 5), press the Enter key to apply the font type to the selected text.
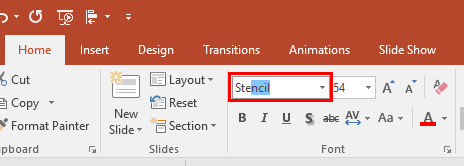
Figure 5: Type font name within the Font box
- With the text still selected, navigate to the Home tab of the
Ribbon and within the Font group
click the down-arrow located next to Font Size option, as shown highlighted in red
within Figure 6. This brings up the Font Size drop-down gallery, as shown in
Figure 6.
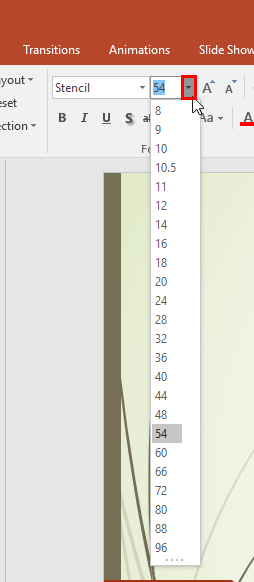
Figure 6: Font Size drop-down gallery
- Note that the highlighted font size is the size of the currently selected text. Now, scroll down the
Font Size gallery to select other font size. As you hover your cursor over any of the font size, you'll see a
Live Preview of changed font size of the
selected text on the slide, as shown in Figure 7 (compare it with Figure 4, shown earlier
on this age). Also you can directly type in the font size value within the Font Size box.
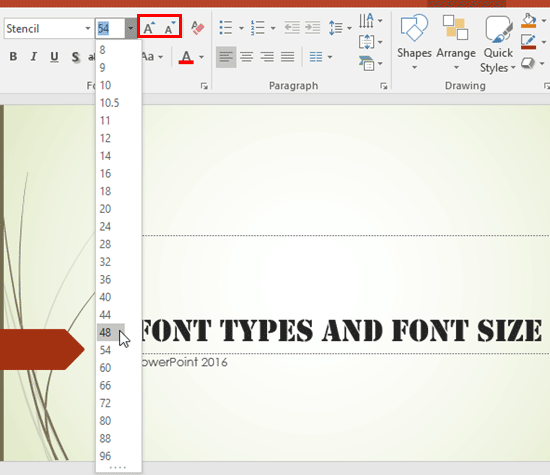
Figure 7: Font Size being changed
- Alternatively, you can also use the Increase Font Size and Decrease Font Size buttons,
highlighted in red within Figure 7 above to change the font size of selected
text.
- Selecting the text (or alternatively right-clicking some selected text) brings up the
Mini Toolbar which includes the same options
(highlighted in red within Figure 8) as within Font group of
Home tab of the Ribbon, to change the font type and font size of the selected text.
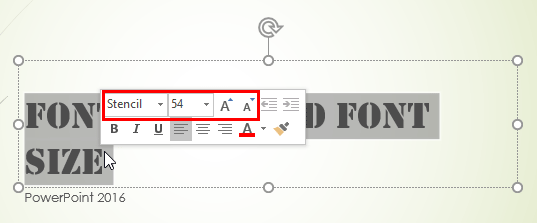
Figure 8: Font type and size options within Mini Toolbar
- Save your presentation often.


