When you are working with multiple pictures on a slide, their position, formatting, and size may be required to be the same across successive
slides. This can be achieved manually using resizing and aligning options, although you will use an inordinate amount of time making sure that
the pictures look consistent slide after slide. Even then, there are chances you may not be too happy with the results or the time it takes to make
these changes. You can get over this problem by using a new Slide Layout with a
picture placeholder. As we learned in previous
tutorials, a placeholder is a container that you can use to fill in with all sorts of content types such as text, pictures, charts, SmartArt
graphics, etc.
In this tutorial, we'll explore how to work with a picture placeholder you add to a new Slide Layout in
PowerPoint 2016 for Mac.
- First,add a new Slide Layout within the
Slide Master. With your new Slide Layout active within the
Slide Master view, make sure
that the Slide Master tab of
the Ribbon is selected,
as shown in Figure 1.
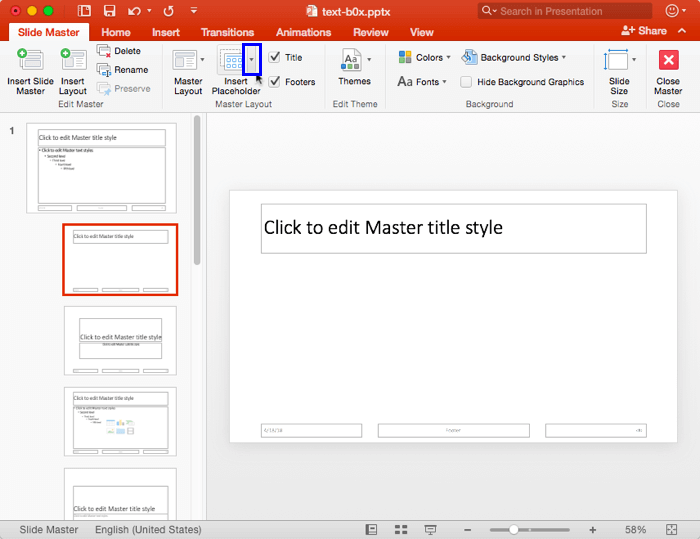
Figure 1: New Slide layout inserted.
- Next, click the arrow part of the Insert Placeholder button (highlighted in blue
within Figure 1, above).In the resultant menu, select the Picture option in the resultant drop-down gallery,
as shown in Figure 2.
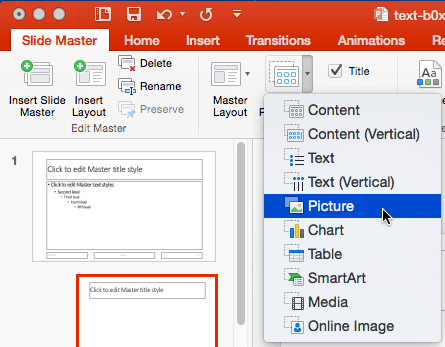
Figure 2: Picture option with Insert Placeholder menu.
- Go ahead and insert
a Picture placeholder, as shown in Figure 3. Note that your new Picture placeholder already has a bulleted
list with a single line that reads Picture.
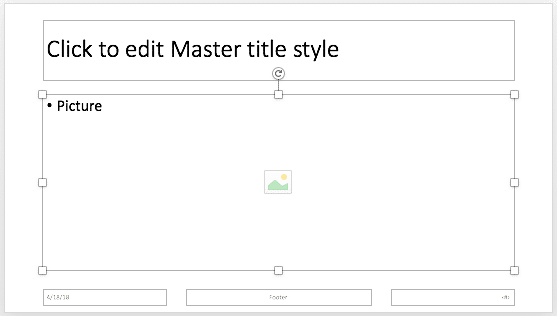
Figure 3: Picture placeholder within the Slide Layout.
- Now you can get rid of the bullet, and also change the boilerplate text. Click anywhere on the word Picture within the
placeholder. Notice that as soon as you click, all text disappears but the bullet is retained, as shown highlighted in
red within Figure 4.
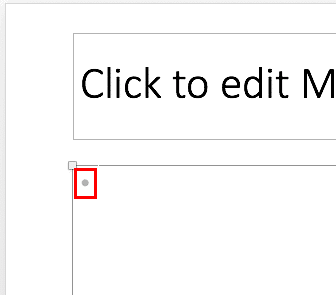
Figure 4: Bullet within Picture placeholder.
- To get rid of the bullet, press the Delete ⌫ key on your keyboard and then start
typing the boilerplate text you want. We typed in Click to insert a picture, as shown in Figure 5.
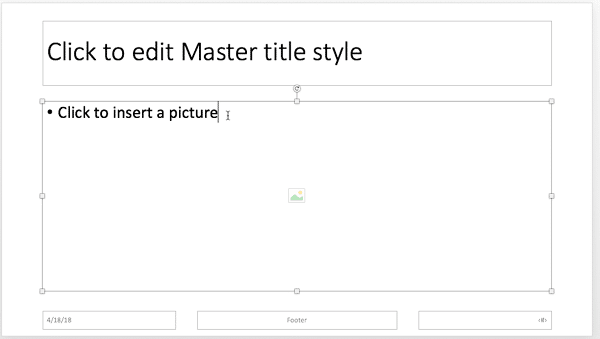
Figure 5: Boilerplate text changed for the picture placeholder.
- Note that the default shape of your picture placeholder is a Rectangle. You can optionally change this shape to something else, such as a
circle, a rounded rectangle, or even a heart. To do that, first select the placeholder and click the Shape Format tab, as
shown highlighted in blue within Figure 6.
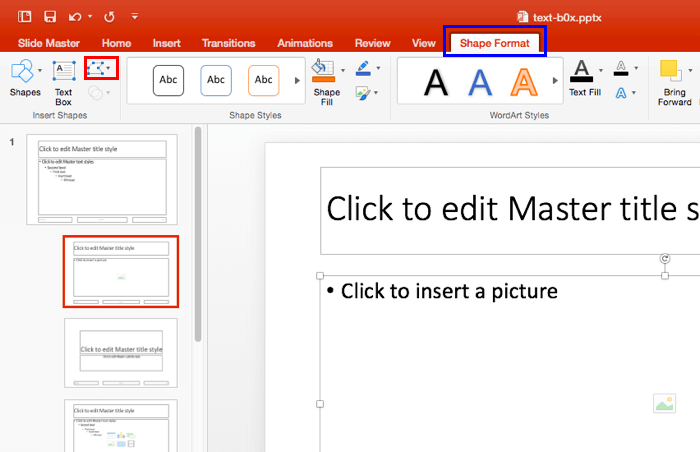
Figure 6: Shape Format tab.
Note: The
Shape Format tab is a
Contextual tab. These Contextual tabs are special tabs
in the
Ribbon that are not
visible all the time. They only make an appearance when you are working with a particular slide object which can be
edited using special options.
- Within the Shape Format tab, click the Edit Shape button
(highlighted in red within Figure 6, above) to bring up the
menu shown in Figure 7. Now click the Change Shape option in this menu to
bring up the Shapes gallery.
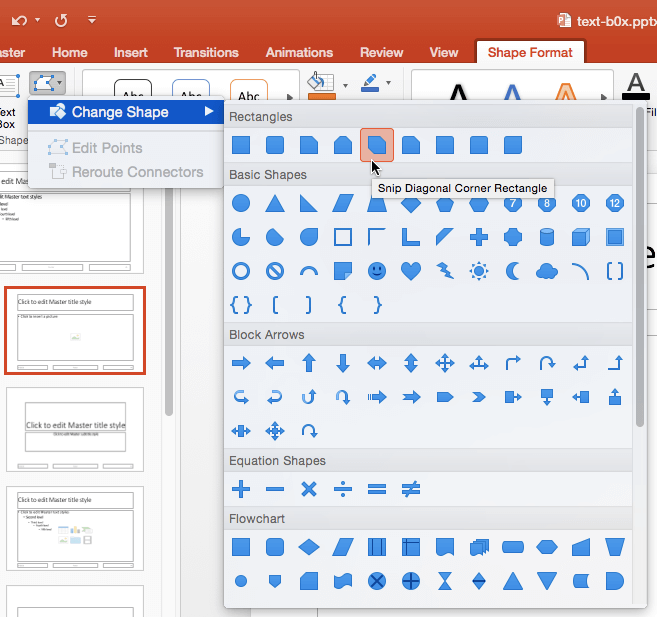
Figure 7: Change Shape option.
- Within the Shapes gallery, choose
any shape type for your picture placeholder. Figure 8, below shows the picture placeholder changed
from a Rectangle to a Snip Diagonal Corner Rectangle (compare
with Figure 5 earlier on this page).
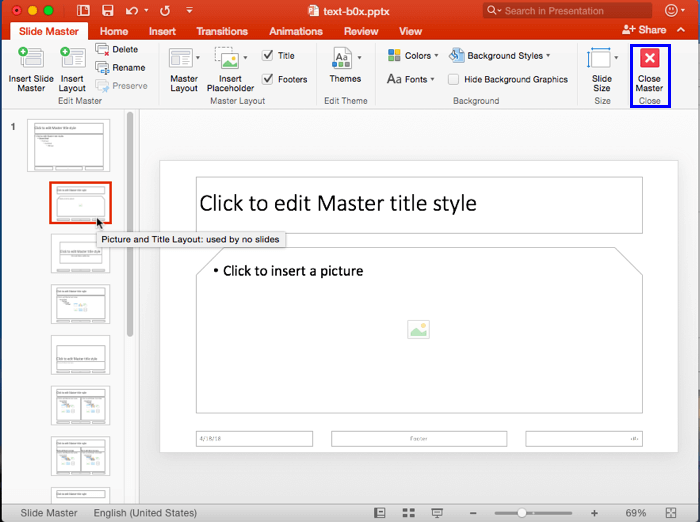
Figure 8: Change Rectangle to a Rounded Rectangle.
- You can also resize the placeholder as explained in our Resizing Shapes in PowerPoint 2016 for Mactutorial to learn more. Although the link provided is
for resizing shapes, you can follow the same steps to resize placeholders. Additionally, you can use
PowerPoint's Merge Shapes feature to create
amazingly shaped picture placeholders. Explore our Create Custom Shaped Picture Placeholders in PowerPoint 2016 for Mac tutorial to learn more.
- When done, rename your new Picture Placeholder layout to a suitable name. In Figure 8 above, you can see the new name of our custom Picture Placeholder layout as a tool-tip. Then, access the Slide Master tab of the Ribbon, and click the Close Master View button (highlighted in blue within Figure 8, above). This will get you back to
Normal View.
- Access the Home tab of the Ribbon and click the Layout button to bring up the
Layout drop-down gallery you see in Figure 9, below. Notice that your new Custom Layout
(highlighted in bluewithin Figure 9) shows up here, ready to be used to create a new slide.
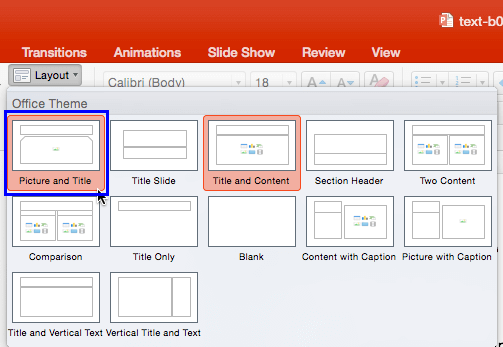
Figure 9: New Slide Layout.
Note: The new layouts you create are saved as part of the presentation, and are not available in any other presentations you
create. In addition to adding placeholders to your new Slide Layouts, you can also
change their slide backgrounds.
- Save your presentation often.


