Do you want to insert a cross mark, which is also called an X mark, in your slides? Very often, this symbol indicates a task is canceled or a concept is negated or no longer applicable. You may want to add this symbol as part of your regular text in text placeholders and boxes, shapes, tables, and even charts. This task is very easy to complete in most versions of PowerPoint for Windows. There may be slight differences, depending upon whether you are using a newer or older version of PowerPoint, but even then, the process is very similar. Using one of these options, you will be able to add a cross mark or an X mark in PowerPoint.
We will look at four ways to add a cross mark in PowerPoint:
- Use an Alt key combination
- Use the Symbol dialog box
- Use the Character Map
- Create an AutoCorrect entry
1. Use an Alt key combination
It's no longer easy to add a cross mark using an Alt key combination in PowerPoint, because when you press the Alt key, and type numbers, this activates commands on the Quick Access Toolbar. Fortunately, you can still use Notepad with the Alt key trick, as long as you have a separate number pad on your keyboard:
- Launch Notepad, as shown in Figure 1, below.
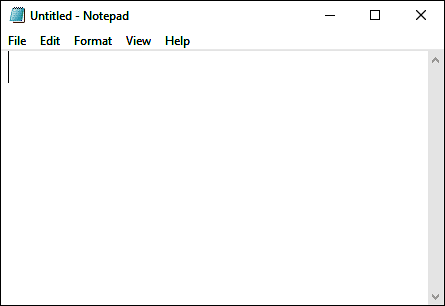
Figure 1: Place your insertion point in Notepad - Now, hold the Alt key while you type 0251 on the number pad of your keyboard to insert an û (u circumflex) character (see Figure 2, below).

Figure 2: Add an û (u circumflex) character in Notepad - Now, copy this character and paste into your PowerPoint slide, as shown in Figure 3, below.

Figure 3: Paste the u circumflex character in PowerPoint - Select this u circumflex character in PowerPoint, and change the font to Wingdings, as shown in Figure 4, below. You will notice that the u circumflex character changed to a cross mark (X mark) symbol.

Figure 4: Change the font to Wingdings
Wingdings, Wingdings 2, and Dingbats
- Are you wondering why an alphabetical character changed into a symbol? That's because we chose the Wingdings font, a font that comprises dingbat characters for every keystroke you type!
- Wingdings has been part of Microsoft Windows since Windows 3.1. After the success of Wingdings, Microsoft created Wingdings 2 and Wingdings 3 too. Do note though that to add this cross mark symbol, you must use Wingdings, and not Wingdings 2 or Wingdings 3.
2. Use the Symbol dialog box
To access the cross mark character from the Symbol dialog box, follow these steps:
- In PowerPoint, click within any text container object to place your insertion point, as shown in Figure 5, below.
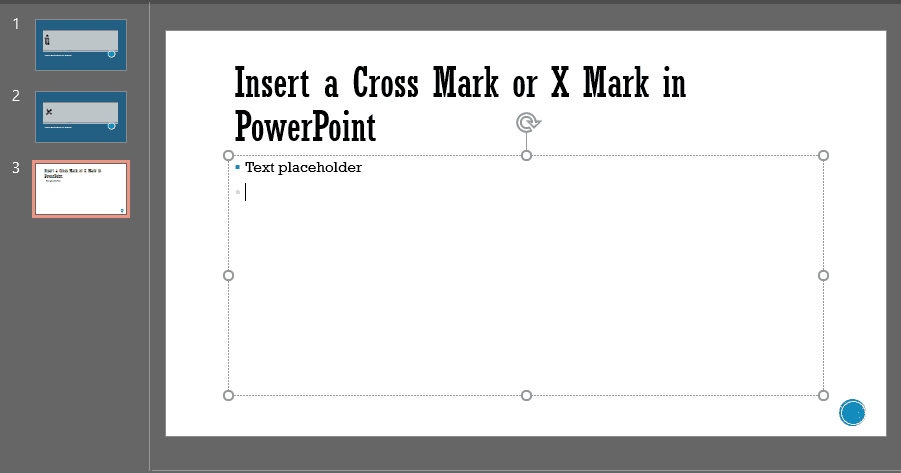
Figure 5: Place your insertion point - Now access the Insert tab of the Ribbon,
and click the Symbol button, as shown in Figure 6, below.
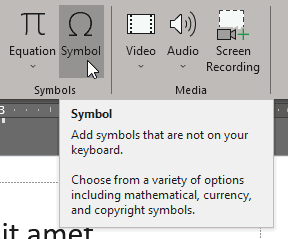
Figure 6: Click the Symbol button - Doing so brings up the Symbol dialog box, that you can see in Figure 7, below.
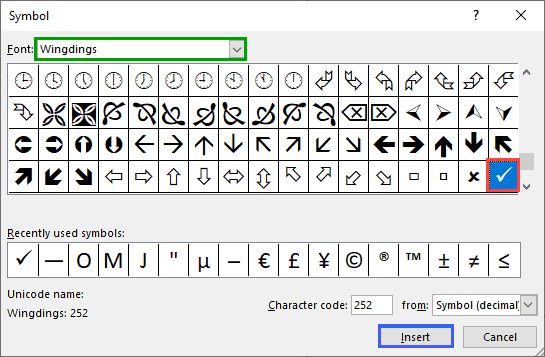
Figure 7: The Symbol dialog box - Make sure you change the font to Wingdings in the Font dropdown list, highlighted in green in Figure 7, above. Scroll down the preview area to find the cross mark character, shown highlighted in red within Figure 7, above. You then press the Insert key, highlighted in blue to place your cross mark in PowerPoint.
Quickly Add Symbols
- Double-click any character to quickly add it to your insertion point in PowerPoint. You can double-click characters in quick succession, one after the other, to add multiple characters to your insertion point on the slide.
3. Use the Character Map
Character Map is not an option within PowerPoint, but a small program that is built-in within Microsoft Windows. To bring up Character Map, you can bring up the Run dialog box from the Windows Start menu, as shown in Figure 8, below.
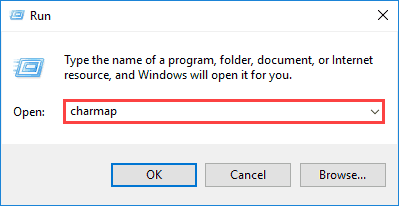
Figure 8: Bring up Character Map from the Run dialog box
Next type in "charmap" without the quotes, as shown highlighted in red within Figure 8. Now click the OK button.
Doing so brings up the Character Map program, as can be seen in Figure 9, below.
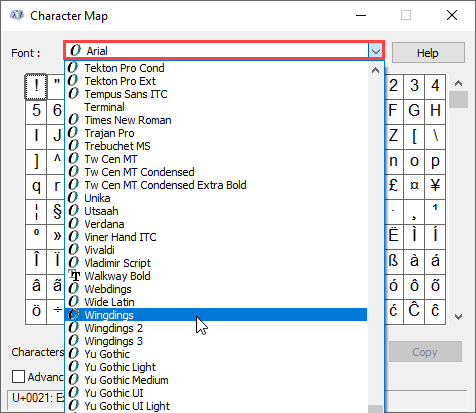
Figure 9: Character Map
Now follow these steps:
- Click the Font dropdown list, as shown highlighted in red within Figure 9, above. Choose the Wingdings font.
- Now, locate the cross mark symbol, as shown highlighted in red within Figure 10, below.
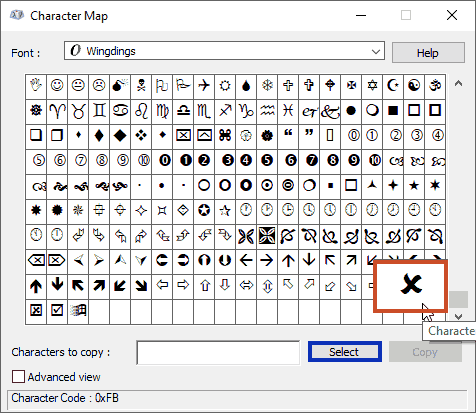
Figure 10: Advanced view in Character Map - Now, click the Select button, highlighted in blue within Figure 10, above.
- Now the Copy button is available, as seen highlighted in red within Figure 11, below. You can click the Copy button, and navigate to PowerPoint or any other open application, and paste it there.
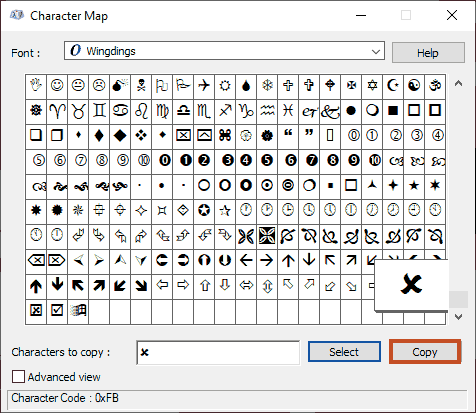
Figure 11: Copy from the Character Map - When you paste, you may not see the cross mark (X mark) as expected. You may see the û circumflex character in PowerPoint. To see the cross mark (X mark), please select the û circumflex character, and change the font to Wingdings.
Sometimes, you may find that the font size of your pasted cross mark character in PowerPoint may be different that the nearby text. In that case, make sure you match the font size of the text pasted.
4. Create an AutoCorrect entry
Finally, you can create an AutoCorrect entry that lets you add a cross mark quickly, with a shortcut. To do so, follow these steps:
- Click the File button to bring up Backstage view. Then click the Options link to bring up the PowerPoint Options dialog box that you see in Figure 12.

Figure 12: PowerPoint Options - Select the Proofing tab in the sidebar and click the AutoCorrect Options button, as highlighted in red within Figure 12, above.
- Doing so brings up the AutoCorrect dialog box, as shown in Figure 13, below. Select the AutoCorrect tab, and type in your shortcut in the Replace box, highlighted in red
within Figure 13. We typed -x, that is a hyphen followed by an x.
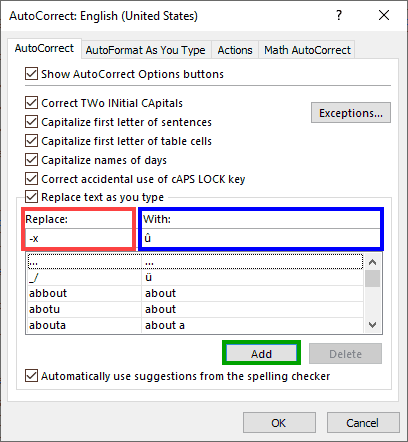
Figure 13: AutoCorrect dialog box - In the With box, we typed in an u circumflex. You can use any technique, or just copy this character (û). Paste this character within the With box, highlighted in blue in Figure 13. Next, click the Add button, highlighted in green.
- This will bring you back to the PowerPoint Options dialog box. Click the OK button.
Now, whenever you type -x, PowerPoint will replace these characters with the u circumflex. In case you don't want the -x characters to be replaced with the u circumflex, press Ctrl + Z to undo. To see the cross mark (X mark) rather than the u circumflex, change the font to Wingdings. Also, do note that any AutoCorrect entry you create will work in all Microsoft applications, such as Word, Excel, Outlook, etc.


