It is true that both pictures and words are important, and they both play complementary roles. If you had to choose just one of them, then you could use pictures because the presenter can always use words to explain what the picture represents. Presentations, by their very nature, are meant to be visual in nature. Text and speaking are important too, but you can be more effectively heard and remembered if your content includes pictures.
Adding pictures to your PowerPoint 2016 for Windows slide is a great way to add some visual detail. Essentially, depending upon the layout of your slide, there are two ways to insert a picture on your slide in PowerPoint:
- You use a layout that includes a Content or Picture placeholder.
- You insert a picture within a slide irrespective of its layout.
Tip: A Content placeholder is a flexible placeholder on your slide that lets you add text, pictures, or any other content types. A Picture placeholder, on the other hand, lets you add just a picture. We use the Content placeholder in this tutorial.
Choose the option that works best for you; we cover both options in the following steps:
- Launch PowerPoint 2016. You will see the Presentation Gallery. Here, select the Blank Presentation option to open a blank presentation with a new slide. Change the layout of this slide to Title and Content by selecting the Home tab | Layout | Title and Content option. This results in the slide layout you see in Figure 1.
- Notice that this layout has a Content placeholder that lets you add bulleted text or any of the 6 different content types in the slide. These 6 content types are indicated by the 6 buttons located right in the center of the Content placeholder (see Figure 1). Click on the Pictures button in the Content placeholder, shown highlighted in red within Figure 1.
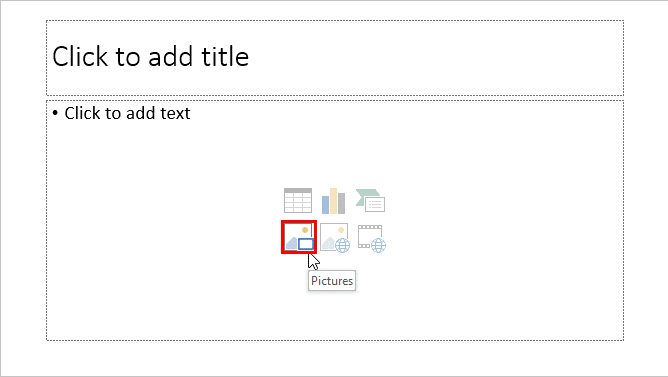
Figure 1: Pictures button within Content placeholder - Alternatively, if you want to add a picture on an existing slide that has no Content placeholder, you can select the Insert tab of the Ribbon, and click the Pictures button (highlighted in red within Figure 2).
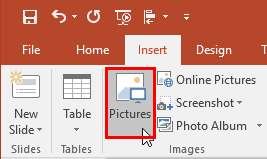
Figure 2: Pictures button within the Insert tab - Either way, you will summon the Insert Picture dialog box. Navigate to the folder where your pictures are located. You will see the icons or thumbnails of the pictures as shown in Figure 3. Alternatively you may just see a textual listing. Select the picture you need, and click on the Insert button highlighted in red within Figure 3.
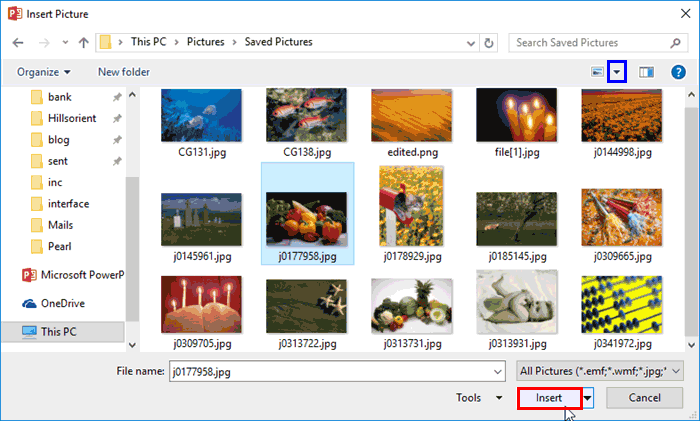
Figure 3: Insert Picture dialog box - Tip: Can't see picture thumbnails, as shown in Figure 3? Do you see a list instead, or smaller thumbnails, or even a detailed list? It's simple to change between these views. Click the down-arrow next to the Change your view button (highlighted in blue within Figure 3, above). This brings up the View Options drop-down list, as shown in Figure 4, below.
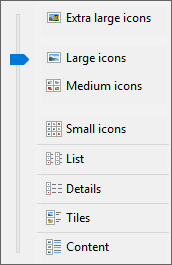
Figure 4: View menu options within Insert Picture dialog boxz - To see thumbnail previews of the pictures, choose any of the options that end with the word "icons", such as Small, Medium, Large, or Extra Large Icons.
- As soon as you click the Insert button, you will see the selected picture placed on your PowerPoint slide, and also the Design Ideas Pane, as shown in Figure 5.
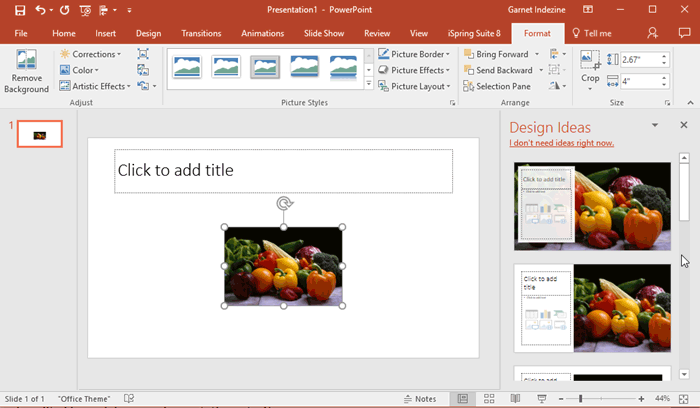
Figure 5: Picture inserted on the slide Cannot see the
Design Ideas pane? That can happen if you are using a perpetual version of PowerPoint 2016 rather than the subscription version. Find out more in our
Updates for Office 365 Applications page.
- The Design Ideas Pane contains thumbnails of various layouts suggested for the active slide, where you have inserted the pictures. Just click on any thumbnail to apply the layout to the active slide, as shown in Figure 6.
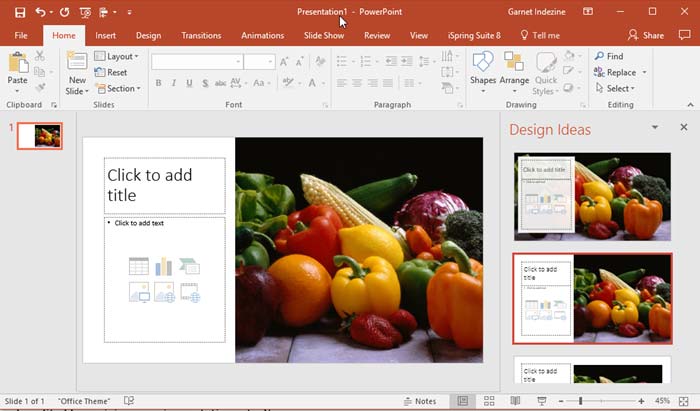
Figure 6 Picture inserted on the slide - Otherwise, just close the Design Ideas Pane to simply insert the picture on the slide, as shown in Figure 7.
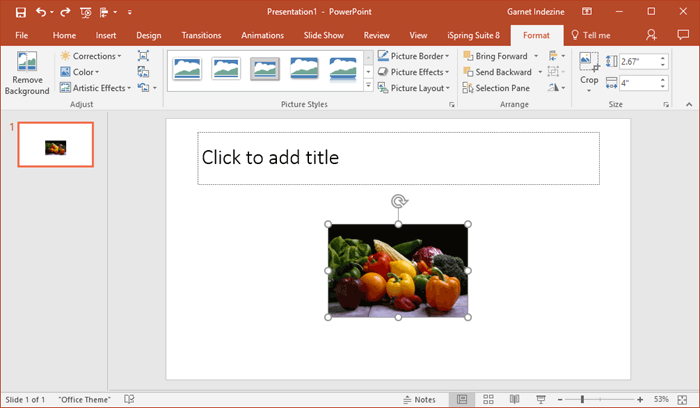
Figure 7 Picture inserted on the slide - Now, the picture you inserted can be edited by resizing, moving, rotating, etc. You can also add effects and more pizzazz to your pictures, as we show you in our picture tutorials.
- For now, don't forget to save your presentation.
Note that the procedure to insert a picture explained above will not retain any relation between the picture in your folder and the picture on your slide. The picture on your slide is an independent copy that is contained within the presentation. If you want to link to the picture, check our Insert or Link Pictures in PowerPoint 2016 for Windows tutorial.
Tip: Do you want to insert tens or hundreds of pictures in successive slides? You don't have to insert them one at a time. Look at
PowerPoint's awesome Photo Album option to get them all on your slides with two or three clicks.


