There are many ways to change the appearance of inserted pictures within PowerPoint. You can use the various Adjust Picture options, and can also add distinctive borders to your pictures. And yes, you can directly apply preset Picture Styles. These Picture Styles are based on PowerPoint's Picture Effects capabilities and add some effects with a click. Most of the time, this means that a single Picture Style adds a reflection, a glow, and a border to your picture. However, you can also apply any of these effects individually to your pictures. In all, PowerPoint provides 6 effects: shadow, reflection, glow, soft edges, bevel, and 3-D rotation.
Follow these steps to learn how you can apply these Picture Effectscin PowerPoint 2010 for Windows:
- Open your presentation and select the picture that you want to apply the border to. You can also select more than one picture on a single slide. Alternatively, if you just want to follow this tutorial step-by-step, launch PowerPoint. Most of the time, PowerPoint will open with a new slide in a presentation. PowerPoint 2010 for Windows users can change the slide layout to Blank by selecting the Home tab | Layout | Blank option. Then, insert a picture and select it.
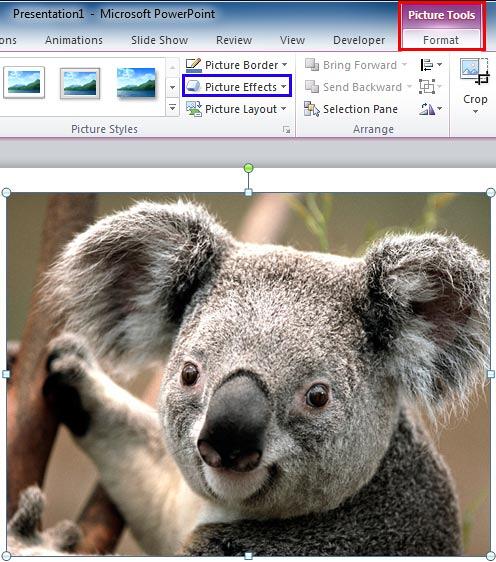
- This brings up the Picture Tools Format tab on the Ribbon (highlighted in red within Figure 1). Make sure that this contextual tab is activated. Within the Picture Tools Format tab, locate the Picture Styles group and click the Picture Effects button (highlighted in blue within Figure 1).

Figure 1: Picture Effects button within the Picture Styles group Note: The
Picture Tools Format tab is a
Contextual tab. These contextual tabs are special tabs in the
Ribbon that are not visible all the time. They only make an appearance when you are working with a particular slide object which can be edited using special options.
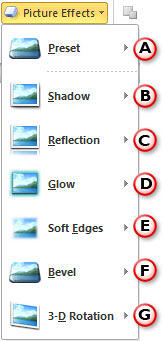
- This opens the Picture Effects drop-down gallery, as shown in Figure 2.

Figure 2: Picture Effects drop-down gallery - Let us explore these Picture Effects options, as marked in Figure 2. For more information on how to apply these effects, refer to the linked tutorials below. Although these linked tutorials discuss the Effect options for Shapes, the procedures explained apply to Pictures as well:
A. Preset
- This option provides some ready to use shape effects, which can be applied to any shape. Learn more about Presets in our Apply Preset Effects tutorial.
B. Shadow
- Applies a shadow to the selected picture. PowerPoint provides three types of shadows: Outer, Inner, and Perspective. You can apply any of these, or customize them to meet your requirements. Refer to our Apply Shadow Effects tutorial for more information on how to use the Shadow Effect.
C. Reflection
- Adds a reflection to the selected picture, and you can choose from several reflection styles. Remember, you should not use shadow and reflection for the same picture. Refer to our Apply Reflection Effects tutorial.
D. Glow
- Provides a hazed, blurred color perimeter outside the Picture area. PowerPoint provides several glow variations; the glow colors are based on the Theme colors. Although, you can also choose any other color as well. Refer to our Apply Glow Effects tutorial.
E. Soft Edges
- This effect makes the picture edges feathered, almost like a moth-edge. Learn more about Soft Edges in our Apply Soft Edges tutorial.
F. Bevel
- Applies bevel effects to the selected picture. You can also customize the applied bevel. Refer to our Apply Bevel Effects tutorial.
G. 3-D Rotation
- Imparts parallel, perspective, and oblique 3-D effects to the selected picture. Refer to our Apply 3-D Rotation tutorial.
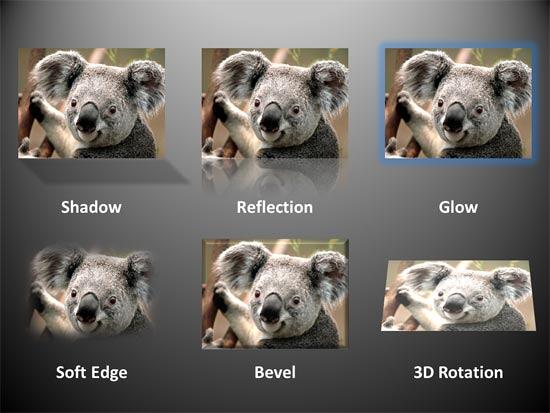
- Choose and apply any of the picture effects. You can apply more than one effect to the same picture. Figure 3 shows the six variants of the same picture with all individual effect types applied.

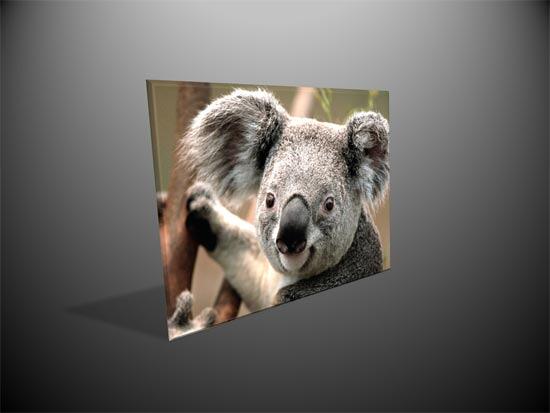
Figure 3: Variants of the same picture with different effects applied - You can also apply multiple effects to the same picture. Figure 4 shows a picture with three effects applied (Shadow, Bevel, and 3-D Rotation). Compare Figures 1 and 4.

Figure 4: Multiple Effects applied to one picture - Remember to save your presentation often.
See Also:


