Learn how you can use AutoPlay Menu Studio to autorun multiple PowerPoint presentations. These PowerPoint presentations can run from autorun CDs.
Author: Geetesh Bajaj
Product/Version: PowerPoint
This tutorial covers PowerPoint 97 and 2000. Look here for a PowerPoint 2003 specific tutorial.
Introduction
Requirements
Step 1: Install The PowerPoint Viewer
Step 2: View Hidden Folders
Step 3: Install AutoPlay Menu Studio 3
Step 4: Create A Virtual CD ROM
Step 5: Install WinZip
Step 6: Prepare a Layout
Let's look at a typical corporate scenario. Your company has fabulous PowerPoint presentations, and now, you want to burn them all on a CD and distribute.
Ideally, you'll want to place the created autorun CD in any CD or DVD drive and be presented with a splash screen. The splash screen is designed with the corporate look of your company and there are hotspots to click, which:
Actually, it's an easy task to accomplish. Just follow this step-by-step tutorial and you'll have created an autorun CD with all your PowerPoint presentations in no time. The same procedure can be followed for a single presentation as well.
BackYou'll require the following software:
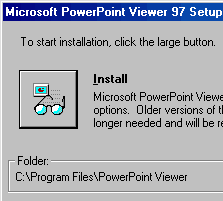
If PowerPoint Viewer is not installed on your system, install it straightaway. Download the latest version from the Microsoft site. The link below will lead you to the download page:
Microsoft PowerPoint Viewer After installation, don't delete the PowerPoint Viewer installation file (ppview97.exe). We'll need it later in this tutorial.
BackBy default, Windows Explorer does not display all files. Some file extensions are designated as hidden. These include DLL files.
To enable viewing of all files, follow these instructions for Windows 98. Instructions for other versions of Windows may slightly differ:

If AutoPlay Menu Studio 3 or later is not yet installed on your system, install it now. There are a lot of benefits in integrating AutoPlay Menu Studio with your autorun CD ROM layouts even before creating your first presentation.
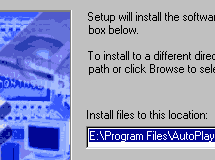
AutoPlay Menu Studio is from Indigo Rose, the same company which creates Setup Factory. To learn more and to download a trial version of AutoPlay Menu Studio, visit:
BackCreate a new folder and give it a name. If you want to follow this tutorial strictly, you could name it "cdrom".
Open AutoPlay Menu Studio and choose 'Create A New Project' from the opening splash.
![]()
You will be presented with the 'Project Template Gallery'. Choose 'Cancel' to dismiss this dialog box. You're now presented with an empty project.
Right click on the project screen and choose 'Project Settings'
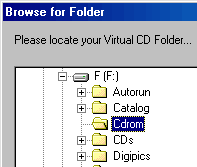
You'll be presented with an option to create a Virtual CD ROM. We chose the 'cdrom' folder as my Virtual CD ROM.
Back in the Project Settings window, don't touch the other options presently. Press 'OK'.
Save your project and exit AutoPlay Menu Studio.
BackIf WinZip is not already installed on your system, you can download a trial version from the WinZip Computing site. The current version is 8, but could be newer by the time you visit.
WinZip can be downloaded from:
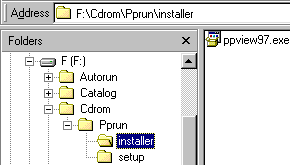
BackNavigate to the 'cdrom' folder using Windows Explorer and create a sub-folder called 'pprun'. Create further sub-folders of the 'pprun' folder and name them 'installer' and 'setup'.
Copy the PowerPoint Viewer installation file (ppview97.exe) you downloaded from the Microsoft site to the 'installer' folder.
Your directory structure should appear similar to this screenshot
Right click 'ppview97.exe' and you should be presented with a few options, including 'Open With WinZip'. Choose this option.

WinZip opens an instance with all archived files listed. Among them is a file called 'PPView1.cab' Double-click this file. The associated application (Windows CAB Viewer or WinZip) will open displaying the contents of the CAB file.
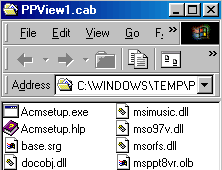
Select all files and copy/extract them to the 'Pprun' folder of the 'cdrom' folder.
Navigate to the 'pprun' folder and delete these three files:
From within the 'pprun' folder, move the 'ppview.dll' file to the 'setup' sub-folder.
Within the 'pprun' folder, create another sub-folder and name it 'present'.
Your folder tree should look similar to this:
cdrom
+pprun
++installer
++setup
++present
The 'pprun' sub folder will contain 25 files in addition to the three sub folders.
The 'installer' sub folder contains a single file: ppview97.exe
The 'setup' sub folder contains a single file: ppview.dll
The 'present' sub folder contains nothing.
You May Also Like: Comparing the Speaking Style of Liz Truss and Boris Johnson | Democratic Republic of Congo Flags and Maps PowerPoint Templates


Microsoft and the Office logo are trademarks or registered trademarks of Microsoft Corporation in the United States and/or other countries.