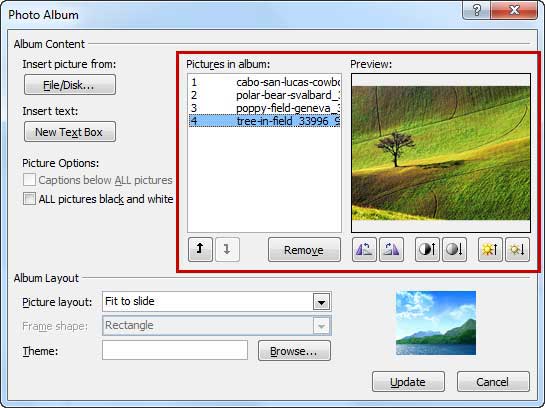
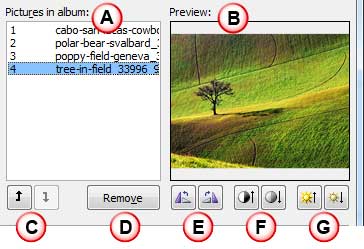
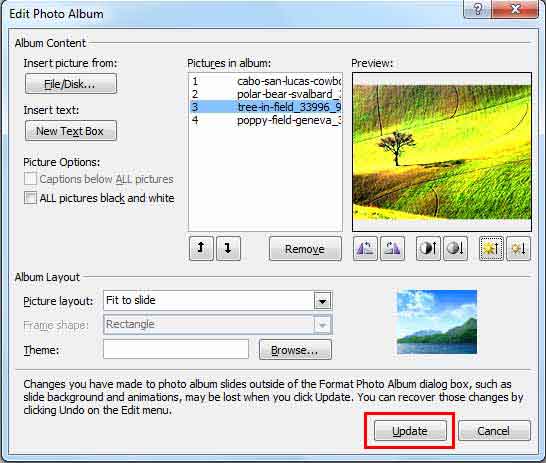
Reorder, remove, and edit photos within Photo Album presentations in PowerPoint 2010 for Windows. These changes can be made with a few clicks for existing Photo Album slides in PowerPoint.
Author: Geetesh Bajaj
Product/Version: PowerPoint 2010 for Windows
OS: Microsoft Windows XP and higher
The Photo Album feature in PowerPoint 2010 for Windows is not just limited to creating presentations that contain photos. After your photo album has been created, you can forget about its existence for a few days or months. Then, you can open the photo album presentation again, and edit it almost like you have just created it a moment ago! You can edit the photo content in many ways, since the Edit Photo Album dialog box provides abundant possibilities. In this tutorial, we'll explore some of these edit options.
For this tutorial, we have created a sample Photo Album using several wallpaper pictures from the amazing National Geographic's Photo of the Day collection
Using a photo from a web site such as National Geographic is intended for personal use only. Don't assume they are free to use anywhere. Read our article on Picture Copyrights which will help you understand this concept better.
Follow these steps to explore some of the editing options within the Edit Photo Album dialog box in PowerPoint 2010 for Windows:


There are no Reset options to undo any changes you make using the edit options explained above. So, be careful before you make any of the changes. Even if you make any changes, these are not applied until you press the Update button that we explain later in this tutorial.

See Also:
Photo Album: Reorder, Remove, and Edit Photos within Photo Album (Glossary Page)
Reorder, Remove, and Edit Photos within Photo Album in PowerPoint 2013 for Windows
You May Also Like: Build A Better Mousetrap And Presentation | Uzbekistan Flags and Maps PowerPoint Templates


Microsoft and the Office logo are trademarks or registered trademarks of Microsoft Corporation in the United States and/or other countries.