Learn about the Share tab of Backstage view in PowerPoint 2019 for Windows. You can share via OneDrive, PDF, or as an email attachment.
Author: Geetesh Bajaj
Product/Version: PowerPoint 2019 for Windows
OS: Microsoft Windows 10 and higher
Among the tabs within Backstage view, we have already explored the Open, New, and Save tabs. In this tutorial, we will explore the Share tab, that provides you with options to share the current presentation through the cloud via OneDrive. You can also email the presentation as an attachment, a link, or a PDF.
Follow these steps to learn more about Share options within Backstage view in PowerPoint 2019 for Windows:

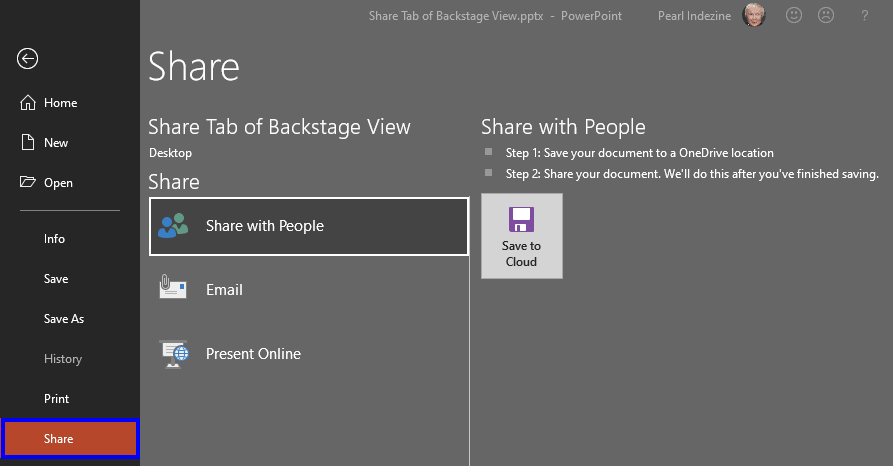
This option lets you share your file with others, but it first needs to be saved to a OneDrive cloud location. To do so, you click on the Save to Cloud button shown in Figure 2, above. Doing so lets you save to a folder in your OneDrive cloud location, as shown in Figure 3, below.
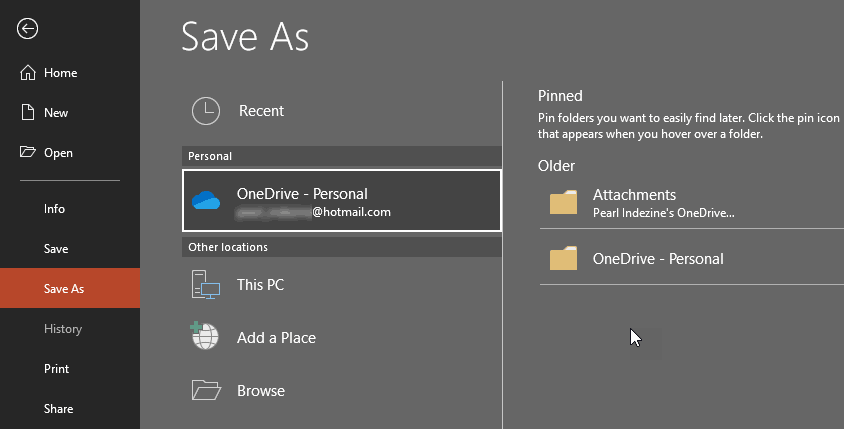
Figure 3: Share options within Backstage view
Do note that you may see more than one OneDrive option here if you have both Personal and Business accounts. In that case, you can choose the OneDrive account you want to use. As soon as you upload the file to OneDrive, you'll notice that the Save to Cloud button changes into the Share with People button, as shown in Figure 4, below (compare with Figure 2, shown previously on this page).
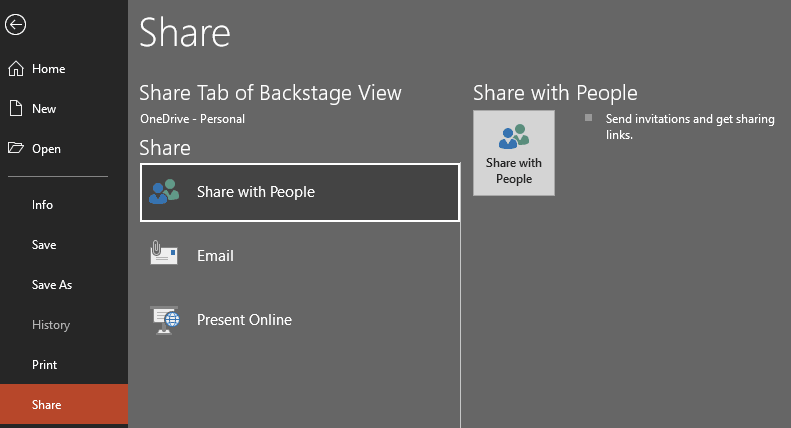
Figure 4: Share with People
Once the uploading is over, the Share Task Pane appears, as shown in Figure 5.
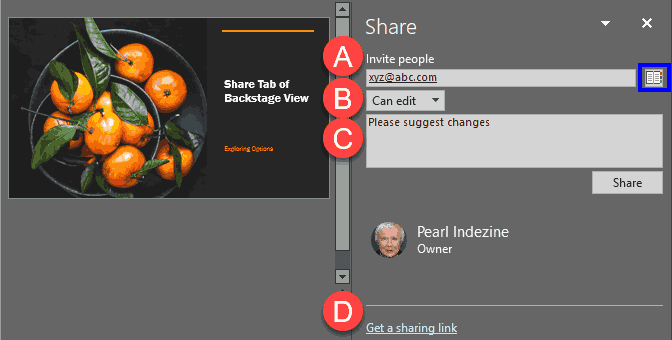
Figure 5: Share Task Pane
Options within Share Task pane are explained below, as shown in Figure 5 above:
You can type an email address within the box provided, or click the Address Book icon (highlighted in blue in Figure 5), and select one or more addresses from the resultant Address Book dialog box.
You can also change the permission level. Click the down-arrow (highlighted in red in Figure 6).
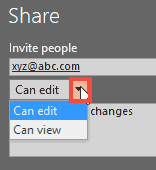
Figure 6: Share permissions
This brings up two options, as shown in Figure 6, above. Choose between Can edit and Can view options depending upon whether you want the recipients to only view the presentation or you want them to edit it.
You can include a message for the recipients if needed. Then, click the Share button.
Selecting this option brings up two options as shown in Figure 7, below.
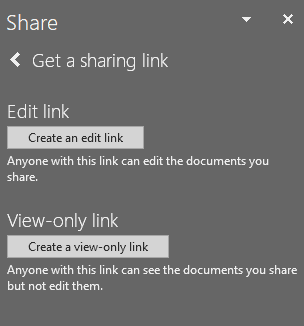
Figure 7: Get a sharing link
Sharing items with this type of link, one can view shared items and use PowerPoint for the Web to edit presentations, all without signing in. For other edits, such as adding or deleting files in a folder, one need to sign in with a Microsoft Account. This link can be edited and forwarded to other people, and anyone who receives the ink will also be able to edit the items.
When this type of link is selected, one can view items without signing in to a Microsoft Account. The link can also be forwarded by the recipient to other people.
Make the choice and click either the Create an edit link button or Create a view-only link button. Once the link is created, you can copy and post the link anywhere, such as a social network.
The Email option in the Share tab brings up several options, as shown in Figure 8, below.
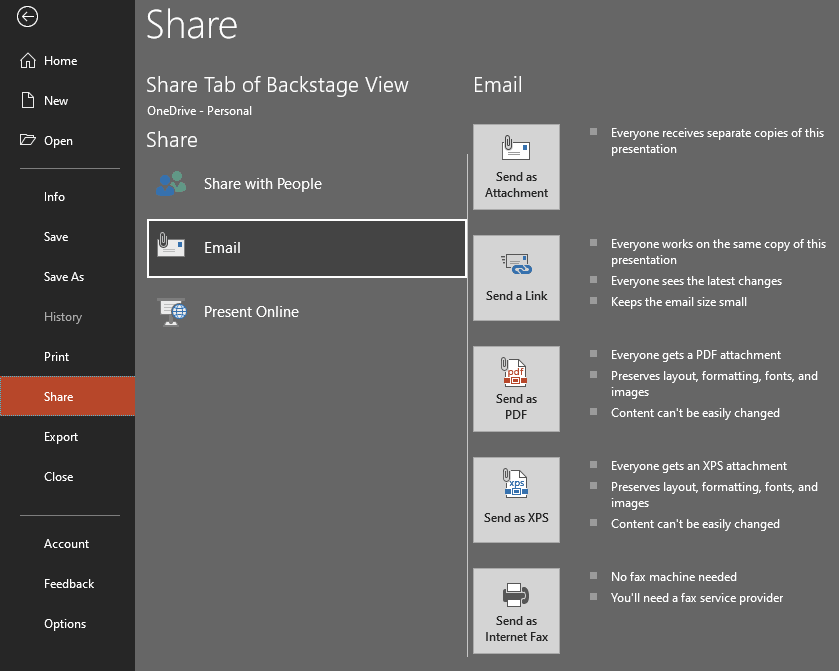
Figure 8: Email sharing options
These options are explained below:
This option sends a copy of your PowerPoint presentation as a file, attached to an email.
This option sends a link to view the presentation on a OneDrive or a SharePoint location to the recipient.
This option sends a PDF created from your PowerPoint presentation as a file, attached to an email.
This option sends an XPS file created from your PowerPoint presentation as a file, attached to an email.
This option uses an internet fax service to send a fascimiled copy of your presentation.
This tab contains options to present your slides online (see Figure 9, below).
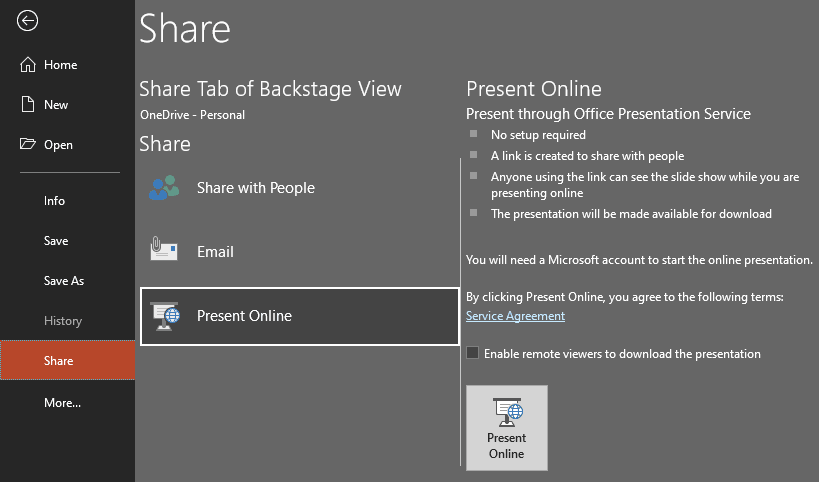
Figure 9: Present Online
Learn more in our Present Online page.
01 08 11 - File Types, File Menu, and Backstage View: Share Tab of Backstage View in PowerPoint (Glossary Page)
Share Tab of Backstage View in PowerPoint 365 for Windows
Share Tab of Backstage View in PowerPoint 365 for Mac
Share Tab of Backstage View in PowerPoint 2019 for Mac
Share Tab of Backstage View in PowerPoint 2016 for Windows
Share Tab of Backstage View in PowerPoint 2016 for Mac
Share Tab of Backstage View in PowerPoint 2013 for Windows
You May Also Like: PowerPoint Presentation Design Deep Dive 2021: Conversation with Amy Balliett | USA Flags and Maps PowerPoint Templates


Microsoft and the Office logo are trademarks or registered trademarks of Microsoft Corporation in the United States and/or other countries.