Although text in PowerPoint can be with a texture, the appearance of the text depends upon the texture choosen, and
how well it contrasts with the slide background. Make sure that the texture used is not too crowded or even multicolored.
And as already stated, choose a texture that contrasts with your slide background for the reason of readability. Look
at the slide shown below in Figure 1. Notice that the texture used for text on the top part of the slide
has a texture fill that almost merges with the background. The texture used as a fill for the text on the bottom part of
the slide looks so much better than the earlier example.
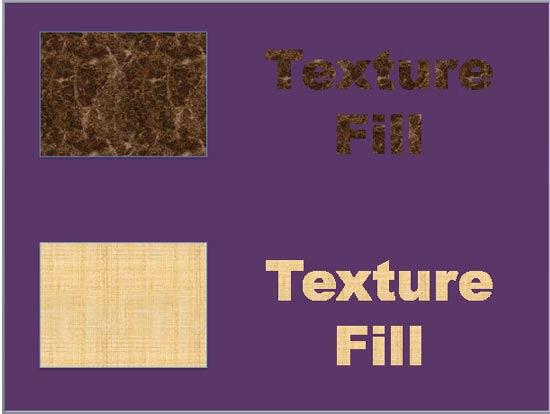
Figure 1: Two examples of Texture fills for text
Follow these steps to learn how to apply a texture fill to your text in
PowerPoint 2011 for Mac:
- Select text to which you want
to apply a texture fill. Alternatively, if you just want to follow this tutorial step-by-step,
insert a text box on a blank
slide and type some text in it. Also,
change the text font to something
"blockier", such as Arial Black (see Figure 2). Select the text, or the entire
text box to bring up the Format tab on the
Ribbon as shown highlighted in
red within Figure 2.
-
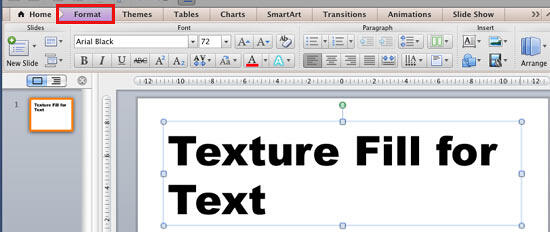
Figure 2: Format tab of the Ribbon
Note: The
Format tab is a
Contextual tab. These tabs are special tabs
in the
Ribbon that are not visible all the time.
They only make an appearance when you are working with a particular slide object which can be edited using special
options within these tabs.
- Within the Format tab, locate the Text Styles group. Then click the
down-arrow within the Fill button that you can see highlighted in red
within Figure 3.
-

Figure 3: Fill button within Text Styles group
- This opens the Fill drop-down gallery for text, as shown in Figure 4. In this
drop-down gallery, select the Text Effects option, shown highlighted in red within
Figure 4.
-
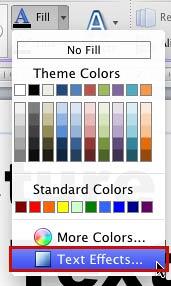
Figure 4: Text Effects option within Fill drop-down gallery
- Alternatively, you can directly right-click (or Ctrl +click) the selected text
box, and from the contextual menu, select the Format Text option as shown in Figure 5.
-
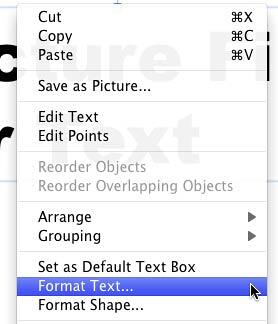
Figure 5: Format Text option to be selected
- Either ways, you will summon the Format Text dialog box as shown in
Figure 6. Make sure that Text Fill option is selected within the sidebar (highlighted
in red within Figure 6).
-
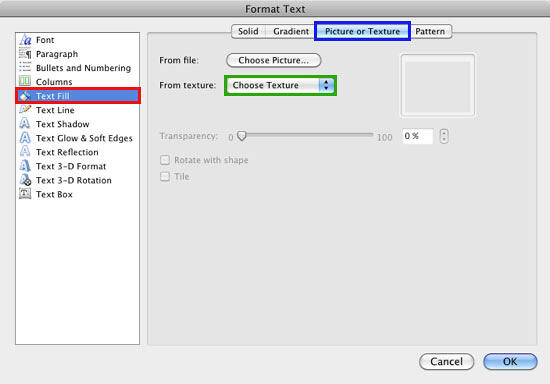
Figure 6: Format Text dialog box
- Select the Picture or Texture tab (highlighted in blue within
Figure 6, above). Within this tab, click the Choose Texture button (highlighted in
green within Figure 6, above). This displays the texture drop-down list,
as shown in Figure 7, below. In this drop-down list you will find 24 different textures which you can
choose from. Click on any texture of your choice as shown in Figure 7.
-
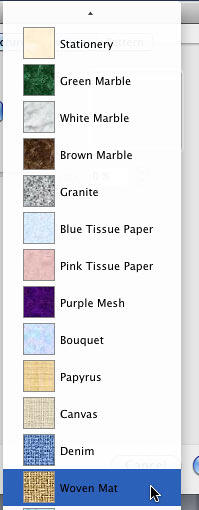
Figure 7: Textures drop-down list
- This will take you back to the Format Text dialog box, where you can now see the selected
texture in the preview area, as shown in Figure 8.
-
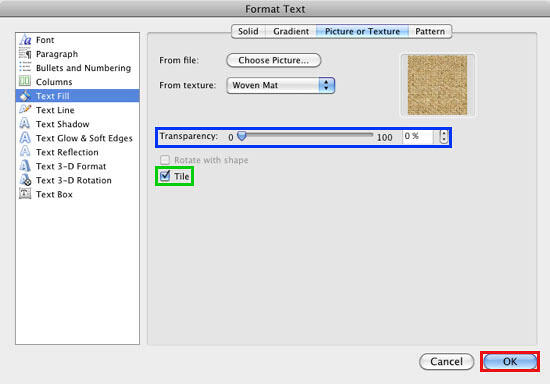
Figure 8: Texture fill chosen for the selected text
- At this point, you can make some more changes to the texture fill using the other options in the
Format Text dialog box as explained below:
- i. If you want to change the transparency of the texture fill, you can use the
Transparency slider, or directly type the transparency value within the box next to the
Transparency slider—both of these have been highlighted in blue
within Figure 8, above.
- ii. When you use the texture as a fill, the Tile check-box (highlighted in
green within Figure 8, above) will be selected by default. This option
needs to be always selected when you use
Custom Textures as Text
Fill.
- After selecting and editing the texture, click the OK button (highlighted in
red within Figure 8, above) to apply it to your selected text.
Figure 9 shows the selected text with a texture fill applied.
-
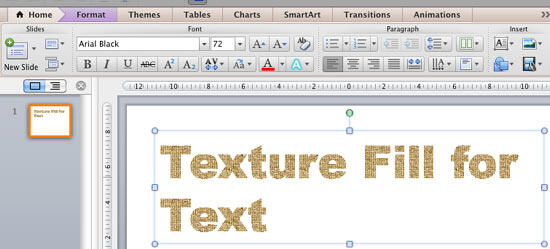
Figure 9: Text with texture fill applied
- Remember to save your presentation often.


