Theme Fonts comprise a pair of font choices, one each for your slide titles (Heading font) and the other for everything else on your
slides (Body font). You can use
existing Theme Fonts available in PowerPoint or
even create them on your own. Additionally, you can opt to edit
existing Theme Font pairs (sets), as we will explore in this tutorial.
Note: It is highly recommended that you only edit Theme Font sets that you may have created or
downloaded, and not edit the ones that are built-in within PowerPoint.
Follow these steps to edit existing Theme Fonts:
- Launch PowerPoint 2013. Navigate to the Design tab of the
Ribbon, and within the Variants group, click
the More button, as shown highlighted in red within Figure 1.
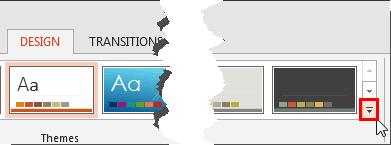
Figure 1: More button
- This brings up the Variants drop-down gallery, as shown in Figure 2. Within the
Variants drop-down gallery, choose the Fonts option to open a sub-gallery (refer to
Figure 2 again). Within the Fonts sub-gallery, right-click on the Theme Font that you want to edit, as
shown in Figure 2. This brings up a contextual menu -- within this contextual menu, select the Edit
option (refer to Figure 2 again).
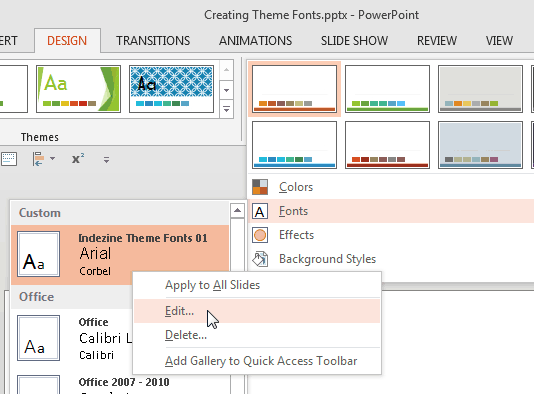
Figure 2: Edit option Note: Do you see the Delete option in the contextual menu shown in
Figure 2? Clicking this option will remove selected the Theme Font altogether. This action cannot be undone; so be
careful before choosing the Delete option.
-
This will bring up the Edit Theme Fonts dialog box, as shown in Figure 3.
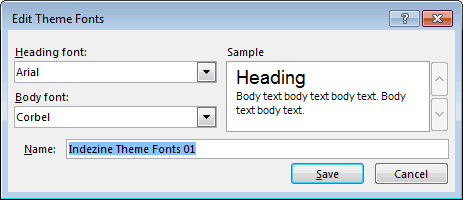
Figure 3: Edit Theme Fonts dialog box
-
Using the options within the Edit Theme Fonts dialog box, you can change the Heading font, the Body font, and also the
name of the selected Theme Font.
- To change the body font, click the down-arrow within the Body font box, as shown highlighted in
red within Figure 4 This action will open a drop-down gallery with all fonts installed on your
system. Just click on the font of your choice. In Figure 4 you can see Candara is selected.
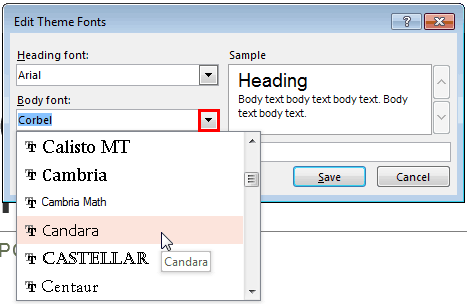
Figure 4: New Body font being selected
-
Similarly you can change the Heading font as well, but we are leaving it unchanged. The fonts you change show within the
Sample section, as shown in Figure 5. Once you are happy with the changes, click the Save
button.
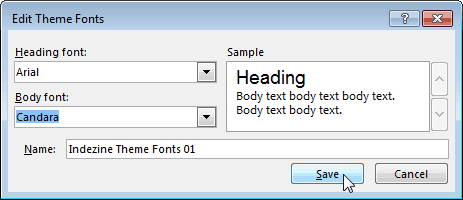
Figure 5: Changes made to the Theme Font
-
This will save the changes to the selected Theme Font, and also apply it to the active presentation, as can be seen in
Figure 6.
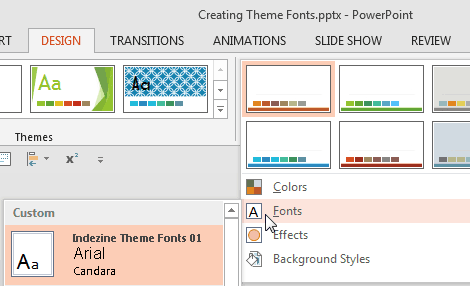
Figure 6: Theme Font edited and applied to the active presentation
While you can make these changes within PowerPoint and also similarly in Word and Excel, you can also make more changes by editing the XML
files that contain the Theme Fonts themselves, as explained in our
Create Custom Theme Fonts Using XML (Windows)
tutorial.


