Do you insert video clips, that are quite long in your presentations? If you answered yes, then, maybe you need to show only part of the video clip, rather than the entire clip. Yes, you can use the Player Controls bar, as shown highlighted in red within Figure 1, below, to scrub and play the clip from exactly where you want it to begin. However, scrubbing a clip in front of an audience can appear unprofessional.
Another way is to trim the video clip outside PowerPoint in a dedicated video program. You have one more option, and that is to use the Trim Video option within PowerPoint to get some quick and effective results.
Follow these steps to trim a video clip in PowerPoint 2016 for Windows:
- Open your presentation, and navigate to the required slide where you have already inserted a video clip. Select or double-click the video clip to bring up the two Video Tools tabs in the Ribbon. These two tabs are Format and Playback. Click the Playback tab to activate it, as shown highlighted in blue within Figure 1, below.
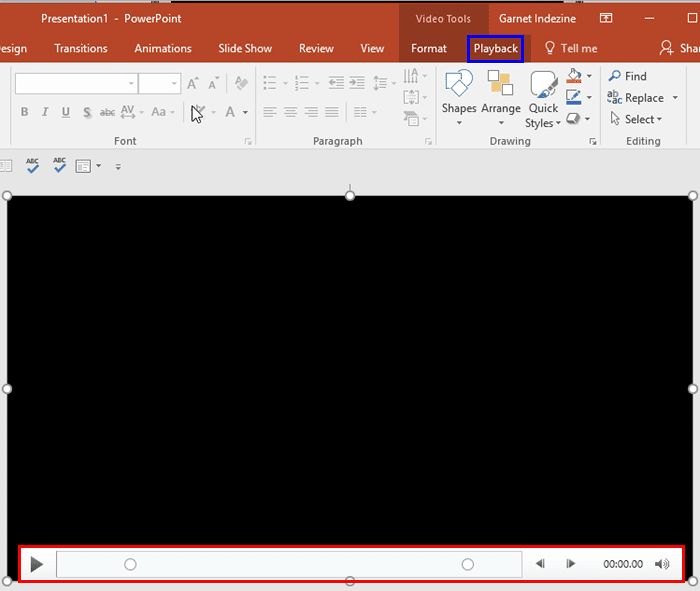
Figure 1: Video Tools Playback tab of the Ribbon
Contextual Tab
- The Video Tools Format tab is a Contextual tab. These tabs are special tabs in the Ribbon that are not visible all the time. They only make an appearance when you are working with a particular slide object which can be edited using special options.
- Now, within the Video Tools Playback tab, click the Trim Video button, as shown highlighted in red within Figure 2, below.
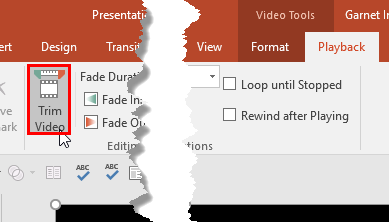
Figure 2: Trim Video button - Doing so opens the Trim Video dialog box, as shown in Figure 3, below. By default, it shows the first frame of your video, which in some cases may be just a black screen. Also notice that any Bookmarks you may have added to your video clip show in this dialog box, as shown highlighted in red within Figure 3, below. Additionally, you see a sound wave representing your video's sound track. This is very helpful if you want to trim off areas that may have no sound at all.
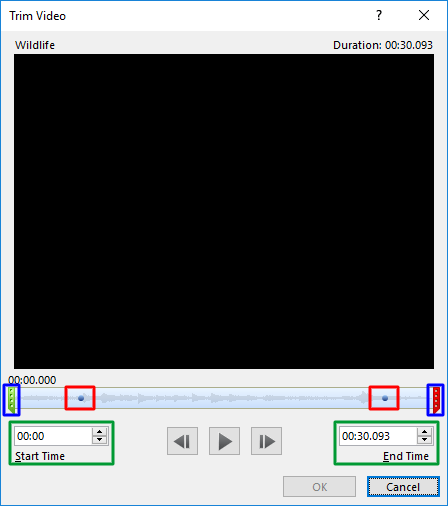
Figure 3: Trim Video dialog box - Notice also the green and red markers representing the Start and End positions, highlighted in blue within Figure 3, above. In addition, the positions of these markers at any given time are shown in the Start Time and End Time boxes, as shown highlighted in green within Figure 3, above.
- If you have added Bookmarks to set your Start and End times, follow further. If not, skip to Step 5.
- Now drag the green and red markers to overlap the Bookmarks, as shown in Figure 4, below. Notice that the markers will not snap to your Bookmarks, so try to be as precise as you can.
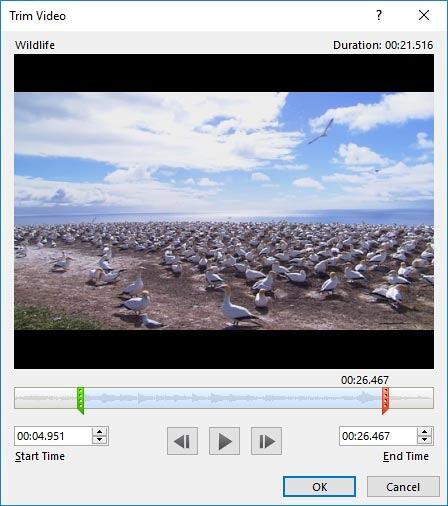
Figure 4: Green and red markers dragged over Bookmarks - If you have no Bookmarks added, you will have to first play the video to ascertain where you want to start and end the video clip. Play the video by clicking the large Play button, as shown highlighted in red within Figure 5, below. When you reach the position where you want to start playing the trimmed video clip, click the Pause button. Now, go ahead and set this paused position as the Start position using any of these approaches:
- Place your cursor over the green marker to see the two-headed arrow, as shown highlighted in blue within Figure 5, below. Then, click and drag the green marker to the same position where you paused.
- Make a note of the time position, and manually enter the time value within the Start Time box, as shown highlighted in green within Figure 5, below.
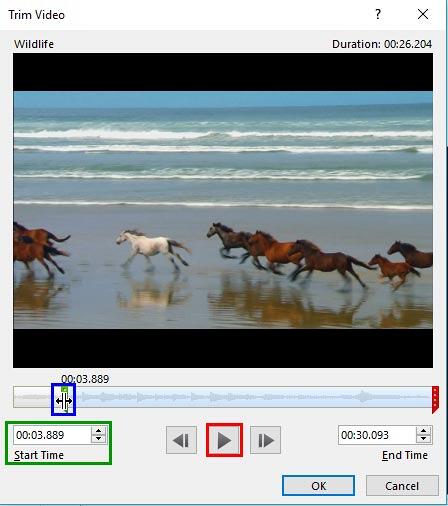
Figure 5: Drag the markers to the same point where you paused the video
-
After setting the Start position, play the video again. When the position where you want to end playing the video clip is reached, pause the video. Now, set your End position as well by either dragging the red marker to the paused position, or by manually entering the time value within the End Time box.
- Before you trim the clip, preview which parts are included by clicking the Play button again, as shown highlighted in red within Figure 5, above. Make changes if you are not satisfied.
- Once you are happy with the parts included in the trimmed video clip, go ahead and trim by clicking the OK button, as shown highlighted in red within Figure 6, below.
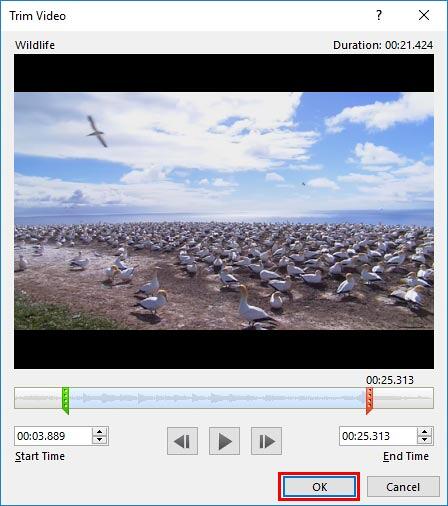
Figure 6: Press the OK button to trim - This action will take you back to the slide with the trimmed video clip, as shown in Figure 7, below.

Figure 7: Trimmed video clip - Notice that although the video is trimmed, you have not lost the parts that were trimmed off. To get them back, or to change the Start and End points again, just select the video clip and click the Trim Video button again. This will get you to the same Trim Video dialog that you saw previously in Figure 6, above. You can actually drag the green and red markers again to their original positions, and all the trimming will be undone!
Trimming and Compression
- You can only edit the start and end points of videos as long as you do not use any of the Compress Media options. Once you compress the video clips, the trimming will be final, and not editable henceforth.
- Make sure to save your presentation often.


