Tables can be animated within PowerPoint 2007 for Windows, but either the entire table can be animated or nothing! Yes, that's a case of extremes—either you have it all or don't have it. To get over this problem, the workaround is to ungroup the table so that your table gets converted to a collection of shapes and then you can animate every individual shape as you want.
Be aware that ungrouping will also get you lots of line segments that are extras. So, do some housekeeping before and after ungrouping your table.
If you are using PowerPoint 2003 for Windows or a earlier version, look at our Ungroup Tables in PowerPoint 2003 tutorial. If you are using PowerPoint 2007 for Windows or a later version, follow these steps:
- We will work with a simple table as shown in Figure 1. It's a good idea to save the presentation to a new name and work with a copy of the presentation or slides.
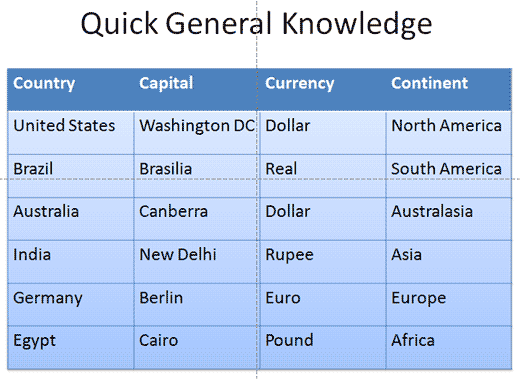
Figure 1: Table in PowerPoint 2007 - Select the entire table. This will show you two new tabs in the Ribbon. Select the tab called Table Tools Design, and look for a gallery called Table Styles, as shown in Figure 2. Select the bare table look at the top left of this gallery (see Figure 2 again). You'll end up with a table that has no borders.

Figure 2: Table Styles - Now with the table still selected, access the Table Tools Design tab again, click the option called Shading, and you'll see some fill formatting options as shown in Figure 3. Choose any solid color fill as shown in Figure 3.
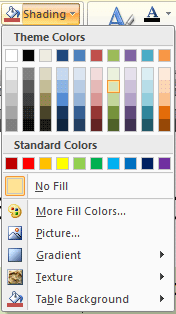
Figure 3: Solid color fill - Your table will now have no borders, and a solid fill so that it looks like what you can see in Figure 4.
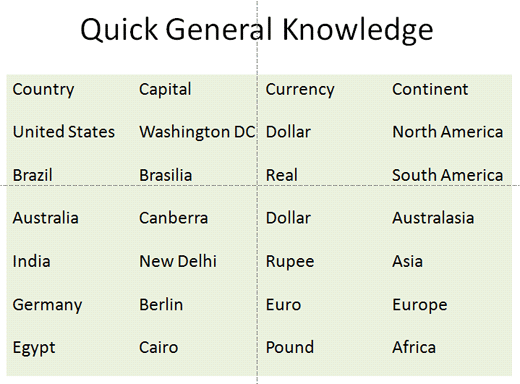
Figure 4: Table with no border - Now select the table, and press Ctrl + C to copy the table.
- Select the Home tab of the Ribbon, click the small arrow under the New Slide button, and choose the Title Only option as shown in Figure 5 to create a new slide that only has a title placeholder.
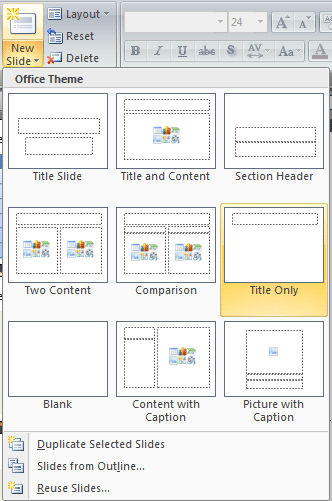
Figure 5: Title only - Again in the Home tab of the Ribbon, click the small arrow under the Paste button, and choose Paste Special to bring up the dialog box that you can see in Figure 6. Scroll down the options until you find an option called Picture (Enhanced Metafile). Then, click the OK button.
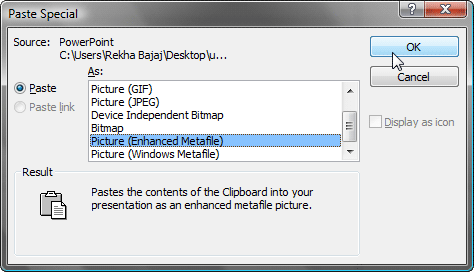
Figure 6: Paste Special - PowerPoint will place an instance of the table graphic right in the center of the slide—reposition as required.
- Now right-click the table graphic carefully, and choose the Group | Ungroup option in the resultant menu as shown in Figure 7.
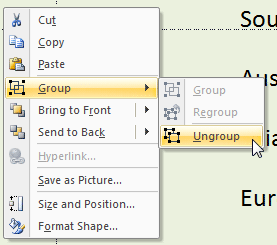
Figure 7: Ungroup - PowerPoint will warn you that the picture (graphic) will convert to a Microsoft Office drawing object (see Figure 8). Click the Yes button to proceed. With the ungrouped table graphic still selected, right-click again carefully, and choose the Group | Ungroup option for a second time (refer again to Figure 7).

Figure 8: Convert table to individual shapes - You'll see that all your individual table cells are now shapes with text (see Figure 9). Click anywhere outside the table area to deselect these shapes.
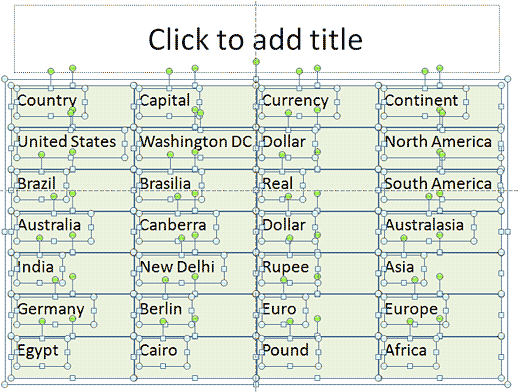
Figure 9: Cells converted to shapes - You'll find that the actual table cell, and the text it contained are now separate slide objects. You can either select them both and group them or you can delete the text altogether, and type it within its original container shape again. Whichever option you choose, this is going to take some time.
Tip: If you need to do this more often, you can do it much faster in PowerPoint 2003 or earlier versions using a similar
tutorial.
- Now carefully select only the shapes you want, and cut and paste them onto another slide. Go back to your older slide and press Ctrl + A. Then deselect individual slide objects like the slide title. You'll find many other extra shapes and line segments. Delete them.
At this point of time, you can format these individual shapes with fills, lines, and effects—and also animate them
individually or in groups as required.


