PowerPoint provides two types of shapes: open and close shapes. In Figure 1 below you can see a thick weighted outline around both a closed shape (on the left) and as an open shape (on the right). Shapes, such as rectangles, circles, etc. are closed shapes. Regular line shapes, such as straight lines, curves, scribbles, etc. are open shapes. Arrowheads can be added only to open shapes, like the one on the right in Figure 1. That's because an arrow needs a pronounced, visible beginning and end.
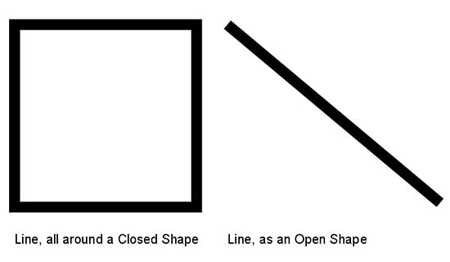
Figure 1: Samples of lines (outlines) in closed and open shapes
We have already explained the basics of outlines and how you can change their weight and Dash types. In this tutorial we'll learn about adding arrowheads to open shapes in PowerPoint 2016. Figure 2 below shows some samples of lines with arrowheads on one or both sides.
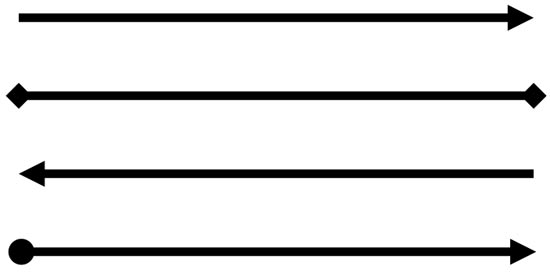
Figure 2: Sample arrow styles (lines with arrows)
Follow these steps to add or edit arrowheads:
- Open your presentation and select the open shape that you want to format.
- Alternatively, if you want to start from scratch, launch PowerPoint. You will see the Presentation Gallery, here, select the Blank Presentation option to open a blank presentation with a new slide, you can change the Slide Layout to Blank by selecting the Home tab | Layout | Blank option. Then, insert a shape and select it.
- We selected a Line shape, as shown in Figure 3. Selecting the shape brings up the Drawing Tools Format tab in the Ribbon, as shown highlighted in red within Figure 3. Activate this Ribbon tab by clicking on it.
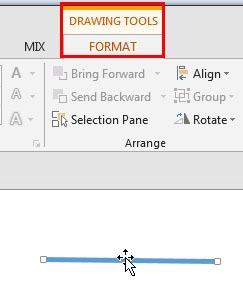
Figure 3: Line shape inserted and selected Note: The Drawing Tools Format tab is a contextual tab. These tabs are special tabs in the Ribbon that are not visible all the time, they only make an appearance when you are working with a particular slide object which can be edited using special options.
- Within the Drawing Tools Format tab, click on the right side of the Shape Outline button (highlighted in red within Figure 4). This brings up the Shape Outline drop-down gallery, as shown in Figure 4. From the Shape Outline drop-down gallery, choose Arrows to bring up the Arrows sub-gallery, as shown in Figure 4.
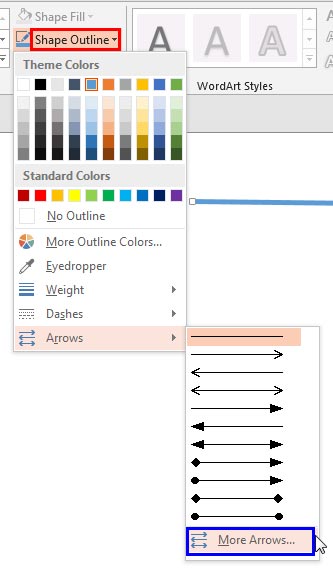
Figure 4: Shape Outline drop-down gallery - Within the Arrows sub-gallery, choose any of the available arrow styles. Alternatively, choose the More Arrows option highlighted in blue within Figure 4, above. This summons the Format Shape Task Pane, as shown in Figure 5.
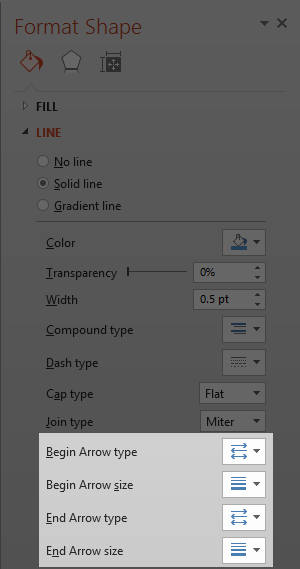
Figure 5: Arrow settings options within Format Shape Task Pane - Within the Figure 5 above all options except those concerned with arrows have been faded out. The other options shown in the faded areas are explained in the Formatting Outlines for Shapes tutorials for Weight and Dash Styles.
- You can customize your arrow style by changing the Begin Arrow type, the Begin Arrow size, the End Arrow type, and the End Arrow size.
- Figure 6 shows the Begin Arrow type drop-down, the End Arrow type drop-down has the same options. In both these drop-downs, you'll find options for 5 arrow styles, and a No Arrow option. You can choose any of these 5 styles. We have used Stealth Arrow style as you can see in Figure 6.
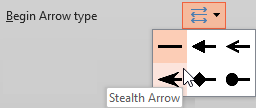
Figure 6: Begin Arrow type options - You also have nine different choices regarding the size of the arrowhead, starting from Arrow L Size 1 to Arrow L Size 9 (letter L stands for left). Figure 7 shows you the Begin sizedrop-down, and not surprisingly, the End size drop-down offers the same options! But the only difference will be that the letter R, denoting Right will replace the letter L.
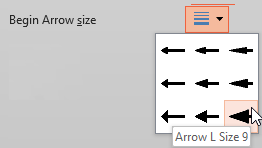
Figure 7: Begin Arrow size options - After choosing the required arrowhead style and size, you can see the line shape with arrowhead applied, as shown in Figure 8.

Figure 8: Arrowheads applied to the line - Save your presentation often.


